|
With a potential advertising reach of 1.9 billion users, Facebook is undeniably one of the most powerful platforms to market your products or services. As an avid online shopper, I know the power of Facebook advertising firsthand. Consider, for instance, the ad I saw on my Facebook feed a few hours after completing a purchase on Free People's website: 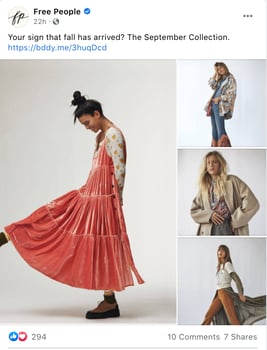 Despite my recent Free People purchase (and dwindling clothing budget … ) I couldn't help but click. I'd just been on their website, but I hadn't seen these clothes yet. Which leads me to my point: the power of targeted advertising. With over 7 million advertisers on Facebook, it can be difficult for brands to stand out on Facebook amidst the masses. Here, we'll dive into the various Facebook ad targeting options you might consider to get the highest ROI on your campaigns — plus, Facebook advertising tips from HubSpot's Paid Ads specialist, Nicole Ondracek. Facebook Ad Targeting OptionsIt's important to note, you'll find all these ad targeting options within your Facebook Ads Manager. Once you begin creating a new ad campaign, you'll have the option to "Create New Audience" or "Use Saved Audience". If you opt to create a new audience, you'll see a field for "Custom Audiences" at the top (in which you can add a custom or lookalike audience, both of which are described below), a section for demographics (including Location, Age, Gender, and Languages), and sections for more detailed targeting or connections. 1. DemographicDemographic Facebook ad targeting options include the opportunity to segment your audience(s) based on age, location, language, work, education, and more. If you sell a product or service that pertains primarily to a certain demographic, this is a good ad targeting option for you. For instance, maybe your audience is primarily millennial females, people who work in the medical industry, or anyone who lives in Spain — all of these factors can help you hyper-target to ensure you're reaching the prospects who are most willing to buy your product or service based on an ad they see on Facebook. 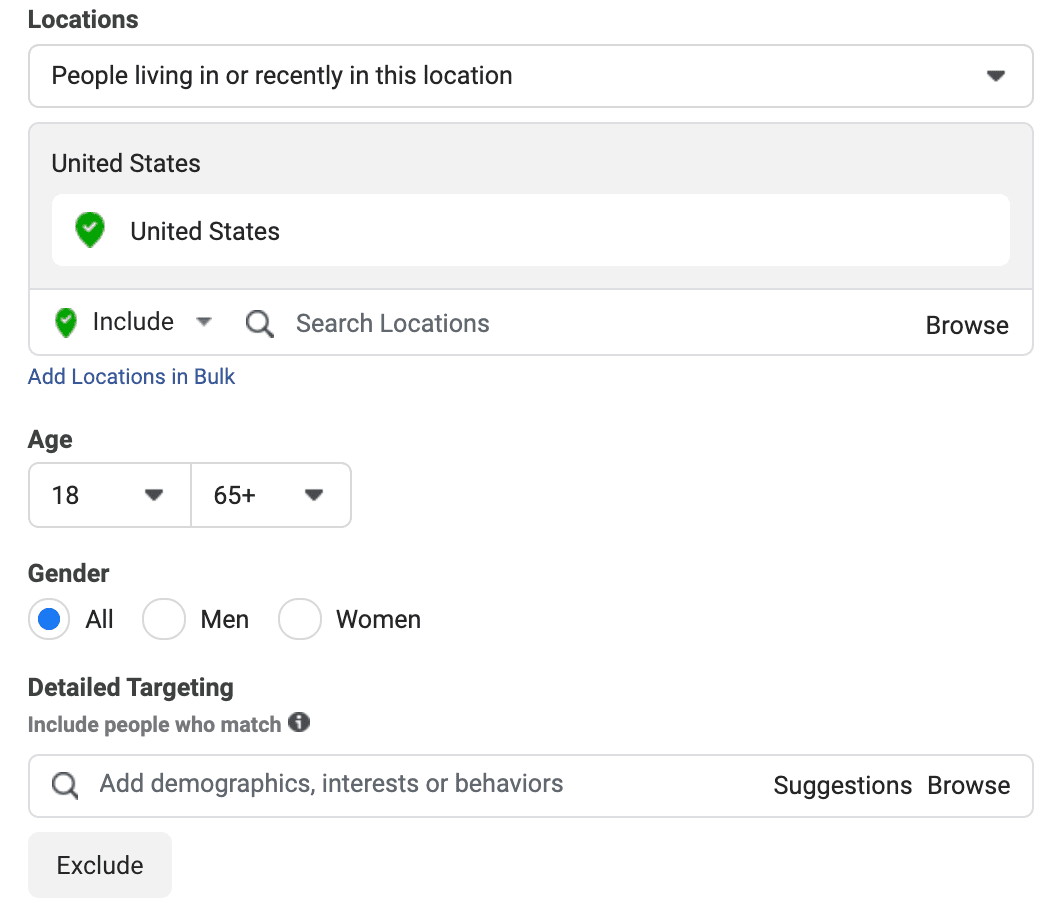 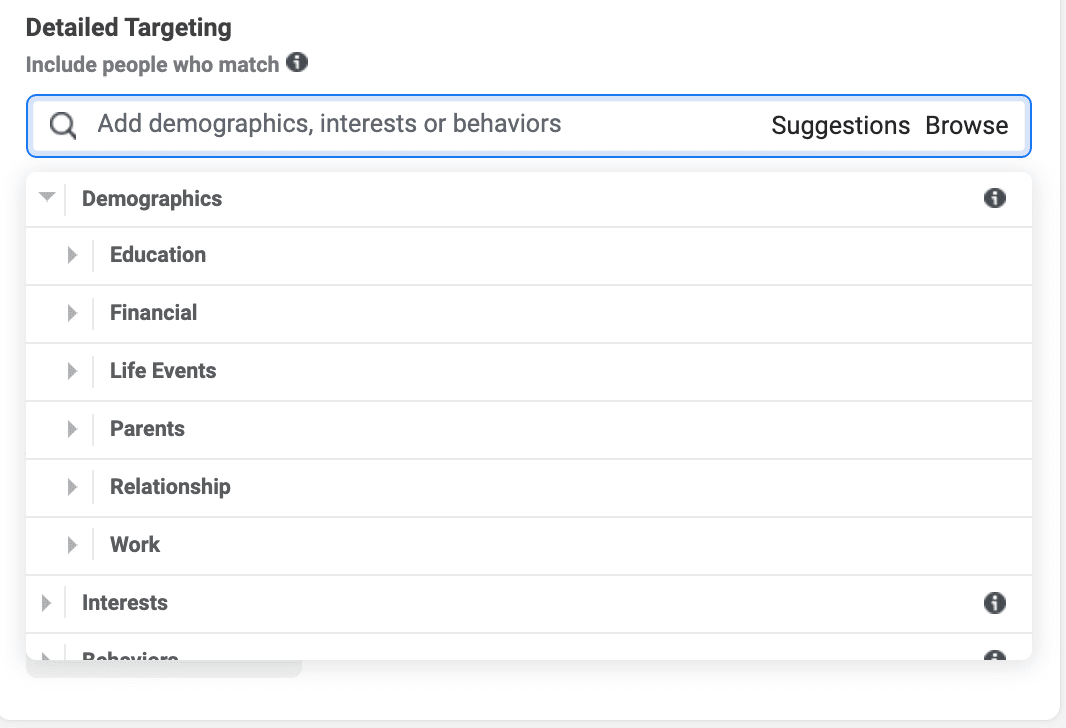 2. InterestsConsider how much you're able to learn about someone from their Facebook activity. For instance, in the last six months I've Liked pages of various restaurants in Boston, MA; I've watched yoga videos via Facebook Live; and I've shopped for clothing on Facebook Marketplace. All of these activities suggest the types of hobbies I'm interested in, and, tangentially, what types of products or services I'd be interested in purchasing. Perhaps you sell a product or service that doesn't pertain to an audience's demographic as much as it pertains to an audiences' interests. A good example of this? Workout gear. Sure, you can guess that your audience is primarily 20 to 30-year-old women, for instance, but a more powerful opportunity for targeting would simply be to target anyone who's Liked fitness pages, or engaged with fitness videos, over the last couple months.  3. BehaviorThere are plenty of user behaviors you'd want to keep track of before sending a Facebook ad their way — for instance, consider my example earlier, in which I'd shopped on Free People's website before receiving a Free People ad on Facebook. Additionally, it's often most effective to target prospects who've already shown interest in your brand. For instance, you might find your Facebook ads perform better with audiences who've already read some of your blog posts or followed you on social media. Ultimately, "behavior" can help you target audiences who've consumed certain types of content, visited certain websites, used certain browsers or devices, or even donated to certain charities. This is a particularly good targeting option for ecommerce re-engagement ads, in which you display ads to users who've added items to their check-out cart on your website. Alternatively, you might consider serving ads to users who've visited a certain landing page on your website.  4. ConnectionsIf you have a specific page, app, or event listed on Facebook that attracts visitors to whom you'd like to serve ads, you're in luck. With "Connections", you can do exactly that. For instance, let's say you recently held a networking event and added 300+ users to the event-specific Facebook page — after-the-fact, you might consider sending specific ads towards those users, who are now more aware of your brand and likely interested in your offerings. Additionally, you can expand your ad's potential by sending the ad to friends of people who've attended your event, as well. 5. Custom AudiencesIf you already have a good list of leads in your database and want to reach them on Facebook, you could simply create a Custom Audience to attract and convert those leads. A Custom Audience enables you to provide specific information you've gathered about your leads, such as a phone number or email, and then target those leads with ads. This is a good targeting option if your goal is to up-sell to existing customers. For instance, perhaps you have a database of customers who currently use your product, but you've recently released new features in a Professional version. One of the best opportunities to attract and convert existing customers is to use Custom Audiences to serve your Professional-product Facebook ads to those customers already in your database. 
6. Lookalike AudiencesLookalike Audiences is a fantastic opportunity to perform cold outreach towards prospects who look similar to your existing prospects and customers. As the name implies, Lookalike Audiences allows you to target ads towards users who match similar characteristics to people who've shown interest in your brand. To further understand what it means for an audience to "look" like your existing database, consider the following example: let's say you upload your email subscriber list to Facebook as a custom audience. Facebook then identifies the following consistent features about your list: users are primarily in their mid-to-late thirties, they live in the United States, they work in banking, and they've shown an interest in travel. Facebook could then find users on Facebook who match all of these qualifications, since users with those criteria seem most interested in what your brand has to offer. Similar to Custom Audiences, you'll need to upload a custom audience for Lookalike Audiences to work — for instance, perhaps you upload a list of email subscribers, event attendees, or website visitors. 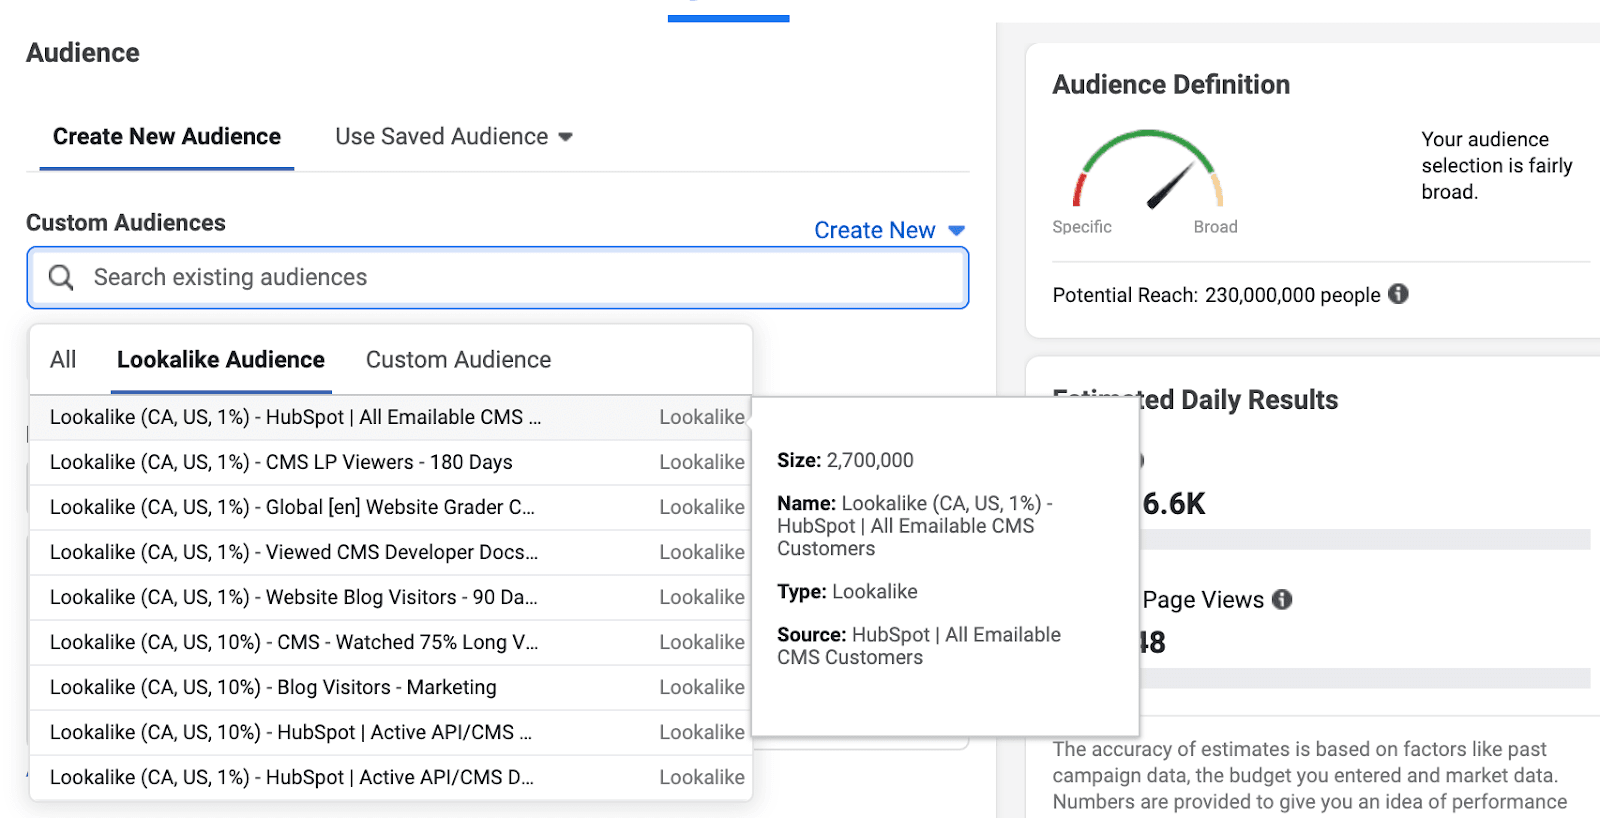 Facebook Ad Targeting Tips1. Repurpose your highest-performing content as a Facebook ad.If you have a few high-performing pieces of content that already attract and convert leads, why not put some paid ad spend behind it? We've seen success with this strategy at HubSpot. For instance, each quarter I send a list of top-performing and high-converting content to the paid ad team, and they reformat it into an advertisement for Facebook. Ondracek adds, "This can apply to different goals throughout a customer's lifecycle. For example, if our goal is to drive more brand awareness to our site, we'll test a blog post that generates a large amount of site traffic. On the other hand, if our goal is more focused on generating leads and submissions, we'll instead test a high-converting content offer, since we care more about conversions than traffic."
Of course, not every piece of content that performs well organically will perform well as a social ad, which is why you want to be highly selective and pay attention to metrics like social media views when choosing posts. But, nonetheless, choosing these high-performers is a good starting point and ensures you're providing new audiences with content that already delights your existing audience. 2. Retarget ads to prospects most likely to convert.With Facebook advertising, you're able to target prospects who've already shown interest in your content, which could be more effective than cold-targeting Facebook users who haven't shown any interest in your brand. With retargeting, you can send ads towards prospects who've already watched a product demo, interacted with a blog post, or downloaded an ebook — which are all signs they're intrigued by your brand and could be interested in learning more. For instance, let's say you work in the ecommerce industry and sell athletic apparel. You might consider creating a gated video on fitness tips from top health experts. Once you've collected an email list of users who've downloaded that video, you can target a follow-up "Top Workout Routines" Facebook to those same video viewers. Ondracek says, "Retargeting is a really powerful approach, and we've found it works best when used to go after an audience similar to the seed list. For example, we've seen success retargeting visitors who have previously visited our pricing page with direct response product ads since they're already in that consideration stage and more likely to buy. She adds, "On the flip side, when we tried retargeting awareness video ad viewers with these types of down funnel ads, we saw worse performance since these two audiences have completely different behaviors." Of course, it's vital to note, you'll want to retarget ads that align well with your products or services. If people have shown interest in content that isn't high-converting and doesn't align with your product, you likely don't want to retarget those viewers, since there's no evidence they'll turn into qualified leads. 3. Leverage existing fans of your business.Similar to the tip above, it's often more worthwhile to target users who've demonstrated their appreciation for your brand by liking your Facebook's business Page. Consider how you might convert those users by retargeting ads towards them. For instance, Facebook Ads expert Jon Loomer found his ads ROI increased dramatically when he targeted fans, rather than non-fans. In fact, his fan-targeted ads returned 129 conversions and resulted in $9,481.50 in revenue — 45.9X ROI. When he targeted non-fans, he didn't convert at all. 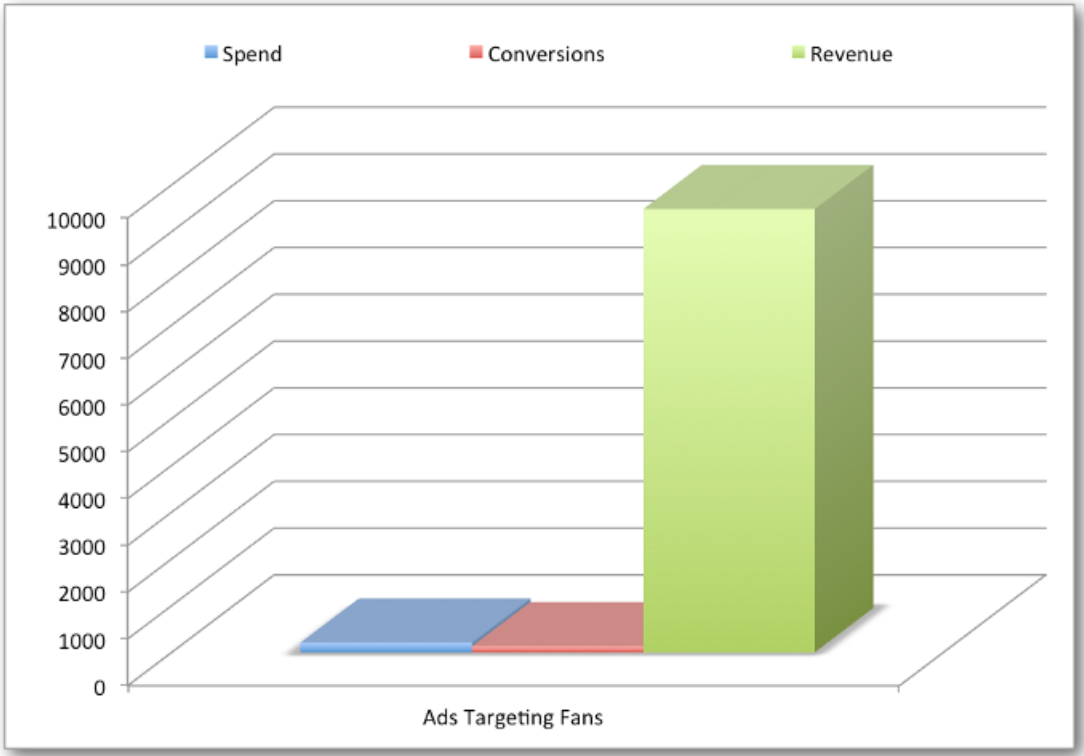  Ultimately, it's much less obtrusive to target ads towards people who want to see content from your brand and have demonstrated an interest in your company. Save time and money by targeting your brand's fans first. Additionally, Ondracek told me, "You can also get creative and try layering on some criteria here. For example, you could try targeting fans of your page who haven’t purchased a product to try and influence some buying power. Or on the other hand, you could try targeting fans who have previously purchased a product if you sell something that can be purchased multiple times —like clothing in the FreePeople ad." 4. Take advantage of custom audiences to up-sell and build loyalty with existing customers.Targeting Facebook ads isn't just effective for attracting new prospects to your business — it's also a good strategy for retaining and up-selling your existing customers. And, considering it's 5-25X more expensive to acquire a new customer than it is to retain an existing one, it makes sense to leverage the customers in your database already rather than only sending ads to brand-new prospects. To up-sell via Facebook ads, think about your existing customers who might benefit from an additional feature, product, or service that you can offer them. For instance, perhaps you've just released new features on a Pro version of your product. More than likely, users of your free or beginner product would be interested in learning about those features, particularly if they're enjoying your product and considering an upgrade. Alternatively, maybe you simply want to target helpful content towards existing customers to increase brand loyalty. You might consider creating a Custom Audience list of customers who've read your social media blog posts, for instance, and then serve ads on your upcoming social media webinar to that audience. 5. Create lookalikes of top-performing audiences to keep improving upon what works best.Ondracek suggests that, once you find an audience that works well following the tips above, you can always create a lookalike of the same audience. She says, "If, for example, you find targeting people who like your page works best, you can create a Lookalike of this same audience to test. This new audience allows you to expand your reach to new prospects and might even perform better." "And what's pretty cool is that these algorithms tend to work! When you upload a list of customers to Facebook and create a lookalike from them, Facebook's algorithm is going to do its best to target your ads to people most similar to your existing customers." Of course, if you don't have enough data or conversions for the system to optimize, it's going to be harder for this approach to work — which is why you'll want to aim to run an audience test for at least two weeks, so there's enough data to work with. 6. Keep an eye out for frequency.Finally, when targeting your ads, you'll want to keep an eye on the frequency metric to make sure someone isn’t seeing your ad too often. Ondracek advises, "If the frequency is too high, you risk hurting your brand perception. We can all name that one brand we see way too many ads for. On the other hand, it can be beneficial for someone to see your ad more than once to increase your brand awareness. You'll have to play around with a sweet spot that works best for your company, but aiming for a frequency of 3-4 can be a good place to start." "Additionally, you can swap out with new creative so the same audience is at least seeing some new fresher content."
Undoubtedly, there are endless opportunities for increasing customer lifetime value by retargeting Facebook ads in an effort to demonstrate your brand's empathy and commitment to helping customers with all their various needs. [Read More ...] from https://blog.hubspot.com/marketing/facebook-advertising-targeting-options
0 Comments
The marketing technology landscape is expanding rapidly, and it's becoming cheaper and easier for marketers to run powerful campaigns on their website or other channels. So, if you want to build a powerful inbound marketing engine, what do you need? Well, first off, you need a website. It also helps to have dedicated landing pages, sales pages, splash pages, and lead capture forms. Additionally, you'll want messaging tools like email, push, or SMS to communicate with your leads and prospects. All of these tools are invaluable in helping you build powerful inbound marketing systems and predictable revenue. To help consolidate all of these marketing elements in one place and test new campaigns, there are powerful suites like ClickFunnels that you might try out — but ClickFunnels isn't for everyone. Here, we'll explore 11 alternatives to ClickFunnels that will help you create high-quality campaigns and drive more revenue in 2020 and beyond. But first — what is ClickFunnels? What is ClickFunnels?At its core, ClickFunnels is a company that tries to help you with all of the above. It's a full suite sales and website funnel building tool, primarily predicated on landing pages and basic marketing automation functionality. The magic is that you can set up pretty clever workflows and funnels without the help of developers. This means you can move faster, test new campaigns rapidly, and therefore, drive more revenue. Some of ClickFunnels features include:
ClickFunnels also has a raving fan community that loves the company. This makes it easy to find help when you need it. However, not everyone is a fan and the tool isn't for everyone. While it has many features, sometimes you don't want or need every one of them, or you'd like to use a more powerful tool to accomplish something specific (such as email or landing pages). Additionally, there are often stronger point solutions for a given functionality. Whatever your reason for seeking an alternative to this popular funnel and landing page building tool, this list should help you with your shopping. 1. HubSpot Marketing HubHubSpot's Marketing Hub includes a myriad of free tools that help marketers do everything from managing your paid ads to collecting leads, building landing pages, and setting up email marketing campaigns. The coolest part is all of your contacts data is stored in the free CRM, so you can easily access insights and use CRM data to improve and personalize your campaigns. As an alternative to ClickFunnels, the all-in-one aspect of HubSpot is a big selling point. Specifically with regards to the landing pages functionality, you're able to build out beautiful pages — sales pages, squeeze pages, downsell pages, upsells, webinar funnels, etc. — using the simple drag-and-drop editor. There are several landing page templates available to get you started, as well. Pros
Cons
Pricing: Starts free and then Starter Tier pricing begins at $50/month.  2. LeadpagesLeadpages is a strong contender in the marketing technology world, and it's an especially popular landing page builder. Essentially, it allows you to build no code (or low code) websites and landing pages. It also includes handy tools for lead capture and funnel building, such as popup forms, alert bars, and an impressive list of native integrations. Previously, Leadpages had also owned a marketing automation platform, Drip, though they have since diverged in Leadpages' recent acquisition. Still, you can easily integrate Drip with Leadpages (or basically whatever marketing automation tool you use). Pros
Cons
Pricing: Starts at $25/month 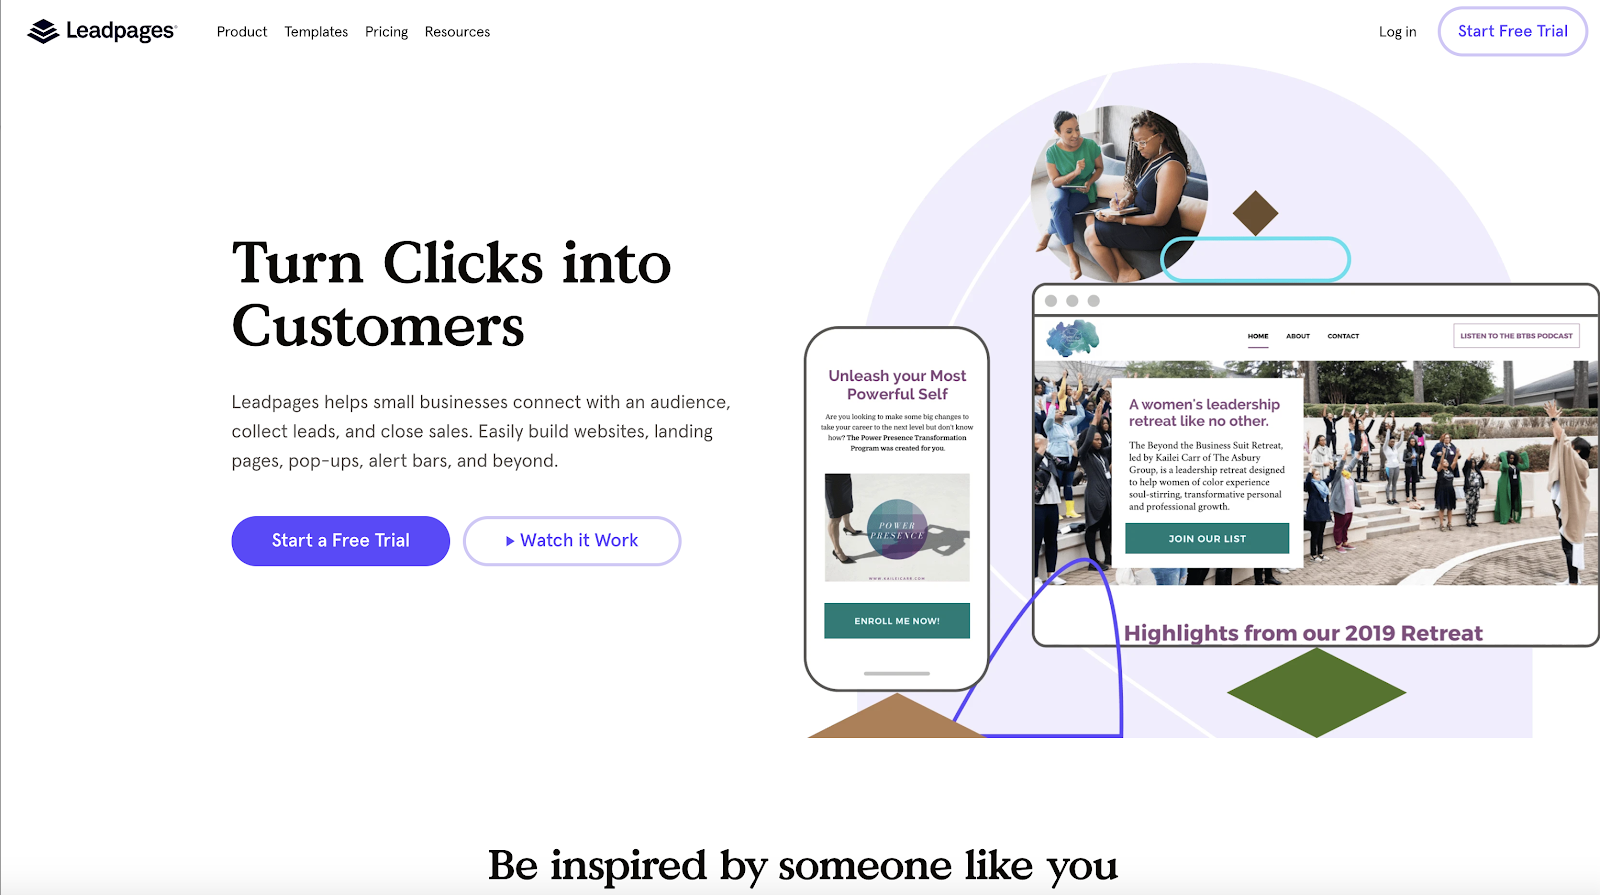 3. UnbounceUnbounce is one of my favorite landing page builders. Their landing page editor is easy to use, but the product is also one of the most powerful and flexible I've tried out. You'll be just as satisfied with the tool whether you're a marketer who can't code, a marketer who can code, a designer, or a developer. It's a great product for landing pages at scale. While landing pages are their bread and butter, they also have some truly great lead capture tools, as well. The pop-up editor is the same WYSIWYG editor that their landing page editor uses, so it's easy to build beautiful pop-ups (not to mention, they've got great templates available, too). Unbounce has also built a substantial community of users, agencies, and developers. So if you're looking for help with design, SEO, or PPC campaigns, there are so many agencies that specialize with Unbounce. One of the coolest features they've recently launched is "smart traffic." This feature uses machine learning to dynamically deliver the right landing page to the right traffic (my guess is through reinforcement learning, but who knows). Pros
Cons
Pricing: Starts at $80/month 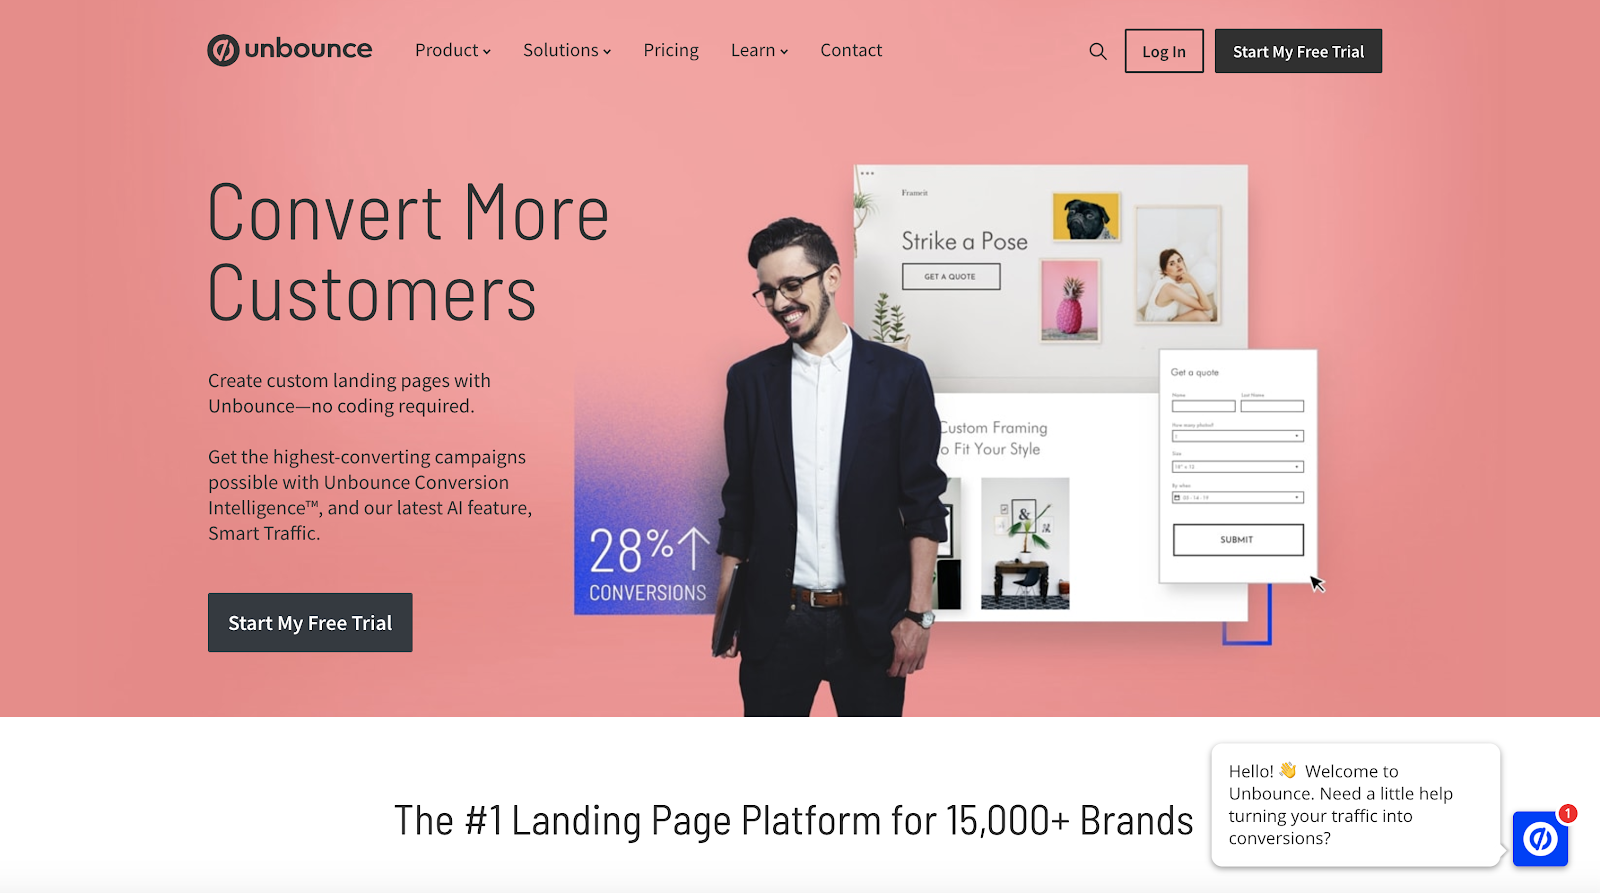 4. InstapageInstapage is one of the most popular landing page tools on the market. They're well-respected among marketers, and offer one of the most scalable solutions when it comes to high-budget growth marketing programs. This includes programmatic personalization, solid experimentation functionality embedded within the product, and AdMaps to visualize the mapping between your pre-click experience on ads and your post-click experience on landing pages. Underpinning all of this advanced technology is a user-friendly page builder that any marketer can master easily. Pros
Cons
Pricing: Starts at $199/month  5. WishpondWishpond is an all-in-one marketing platform that might be one of the easiest to use. First off, they have a stunning array of features. They have ads tools for Instagram, Facebook, and Google, social media promotion tools, email marketing software, lead management, referral programs, landing pages, website pop-ups, cart abandonment triggers, forms, call tracking, and automation. So if you want the full bucket of features and then some, Wishpond is an impressive platform. The tools are all built for marketers, so they're easy to use without the help of a developer. Pros
Cons
Pricing: Starts at $75/month 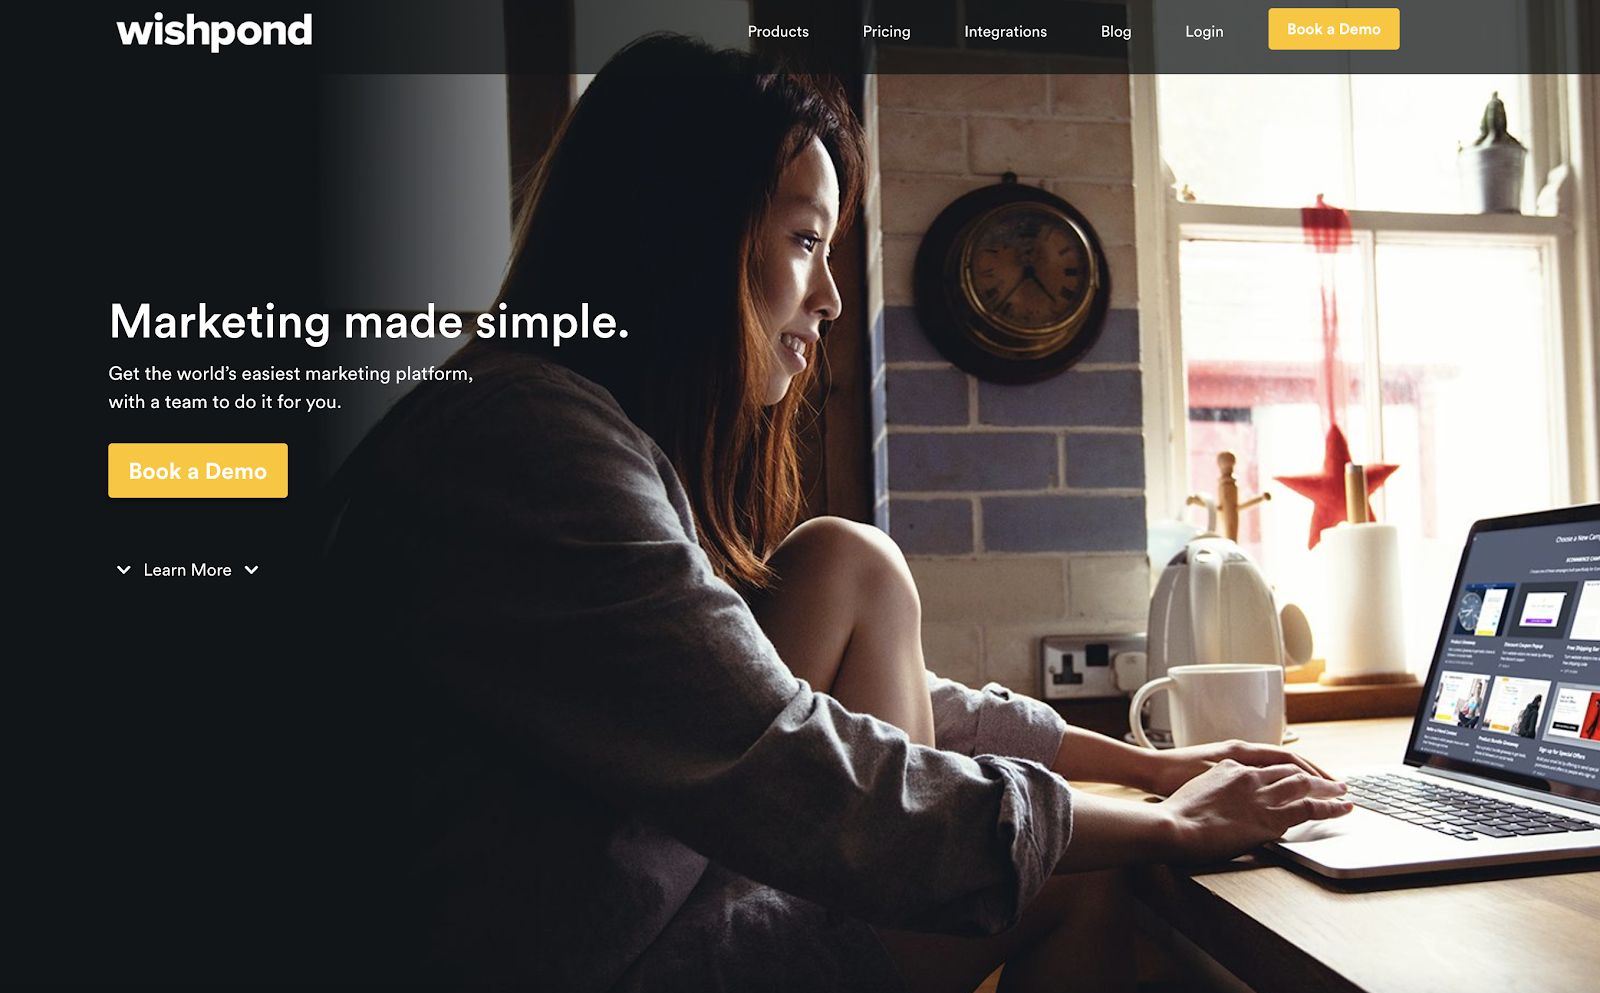 6. GetResponseGetResponse is one of my favorite all-in-one marketing platforms. To be honest, I've mainly used them and love them for their email marketing solution. Great deliverability. But their landing page builder is also impressive. They have some unique features, like robust marketing automation and webinars, as well as some standard tools like forms and pop-ups. You can easily set up sales funnels or lead magnet funnels, and you can even manage and create social media ads in the platform. Sitting on all of this is a powerful set of analytics tools to visualize exactly how your funnels are performing. Pros
Cons
Pricing: Starts at $15/month 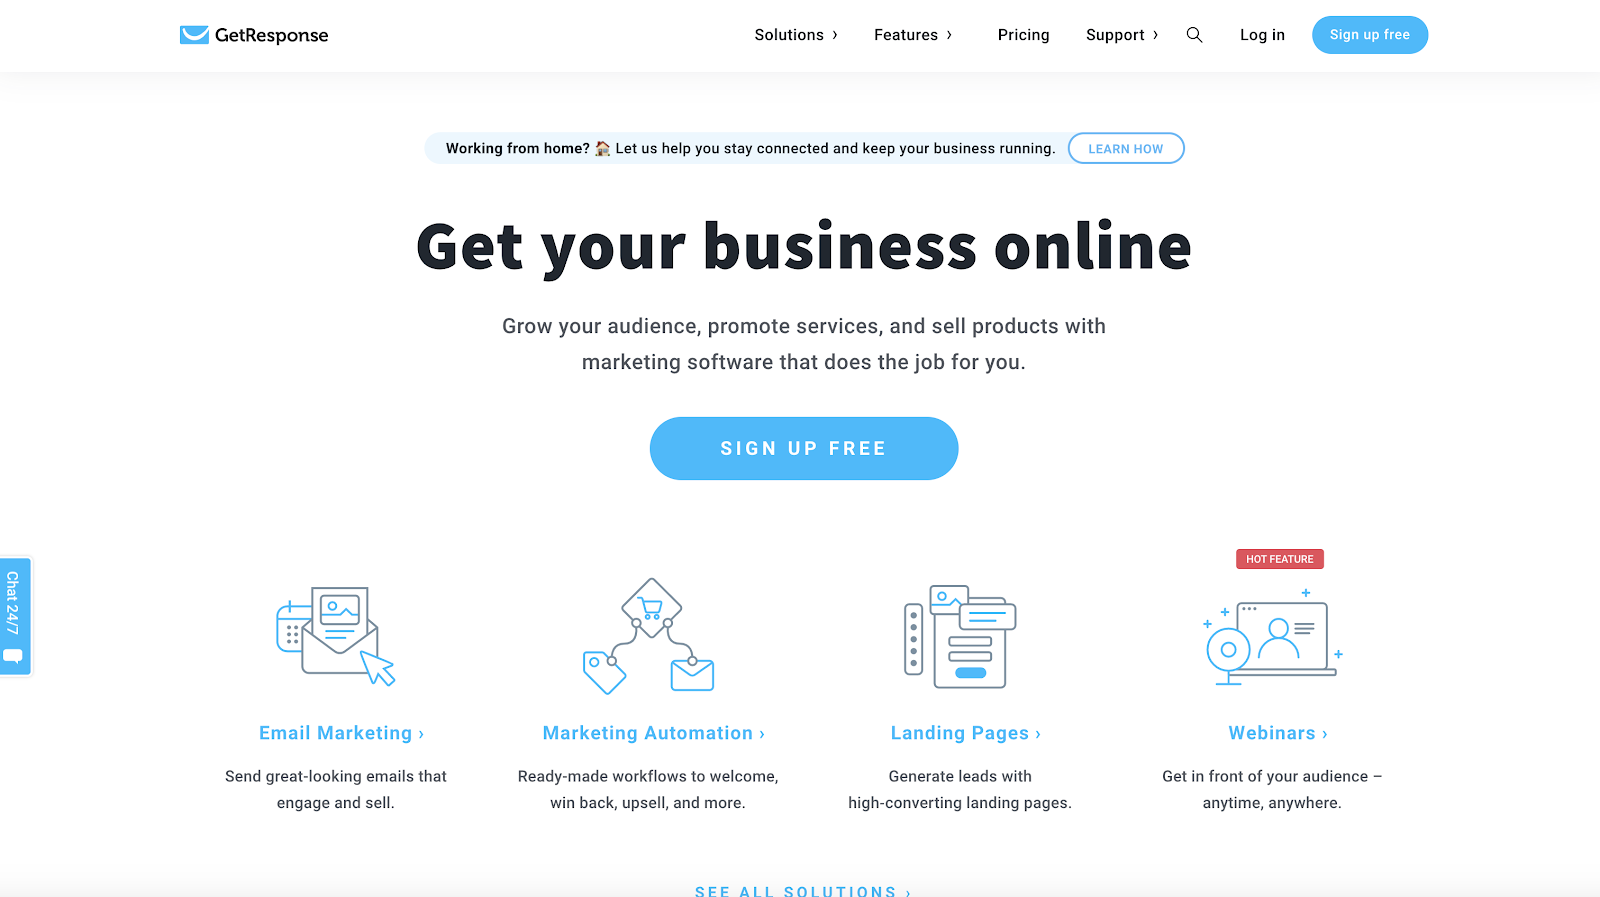 7. KeapKeap, formerly known as Infusionsoft, is one of the premier marketing automation solutions out there. Since rebranding and rolling up into Keap, the company has built out a robust platform complete with a CRM as well as various sales features like invoice management, an appointment scheduler, and a sales pipeline manager. However, most marketers know this company for Infusionsoft, the powerful and long running marketing automation platform. This tool has the whole suite — landing pages, lead capture tools like forms and pop-ups, an email delivery service, automation functionality, and pretty good native analytics reports. All of this makes it a wonderful solution to manage your sales funnel and online business in general. Pros
Cons
Pricing: Starts at $199/month 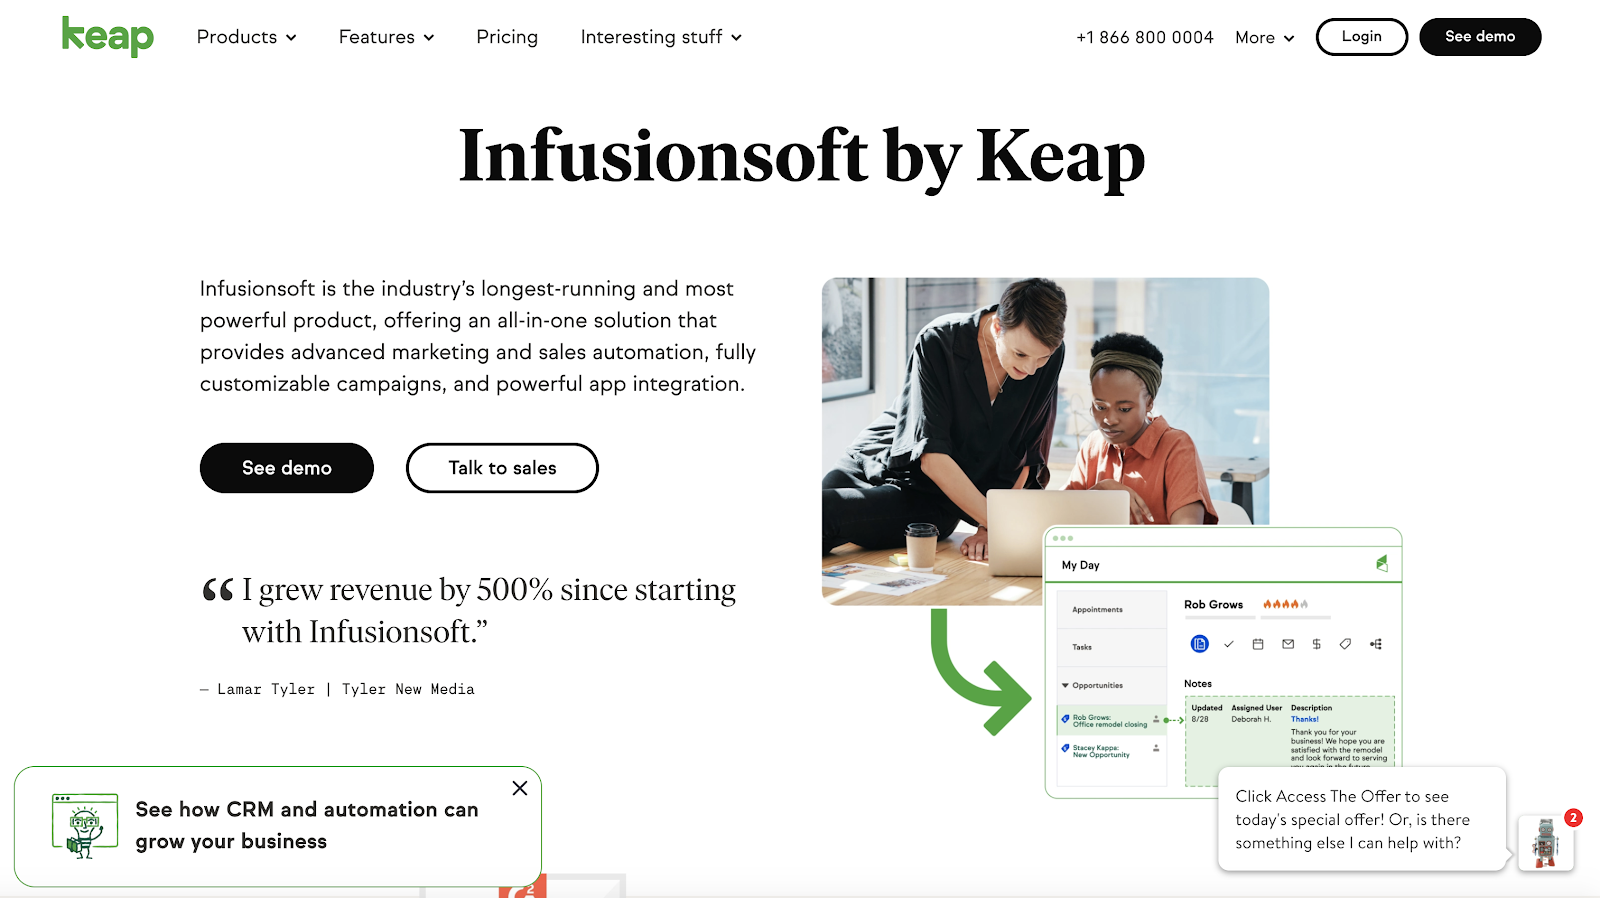 8. ElementorElementor is an insanely popular WordPress page builder. While many ClickFunnels alternatives on this list are full featured marketing platforms, you can get pretty far with WordPress, a page builder like Elementor, and a messaging service (there are many free email marketing tools). Elementor has over 5 million active installations on WordPress, and it's easy to see why. It's an incredibly easy-to-use landing page builder, and any marketer can use it to quickly get started building beautiful pages. Moreover, it starts out free and is quite affordable even at the paid tiers. If you need a simple and effective page builder to act as a funnel builder, Elementor is a great option. Pros
Cons
Pricing: Starts free, next plan begins at $49/month 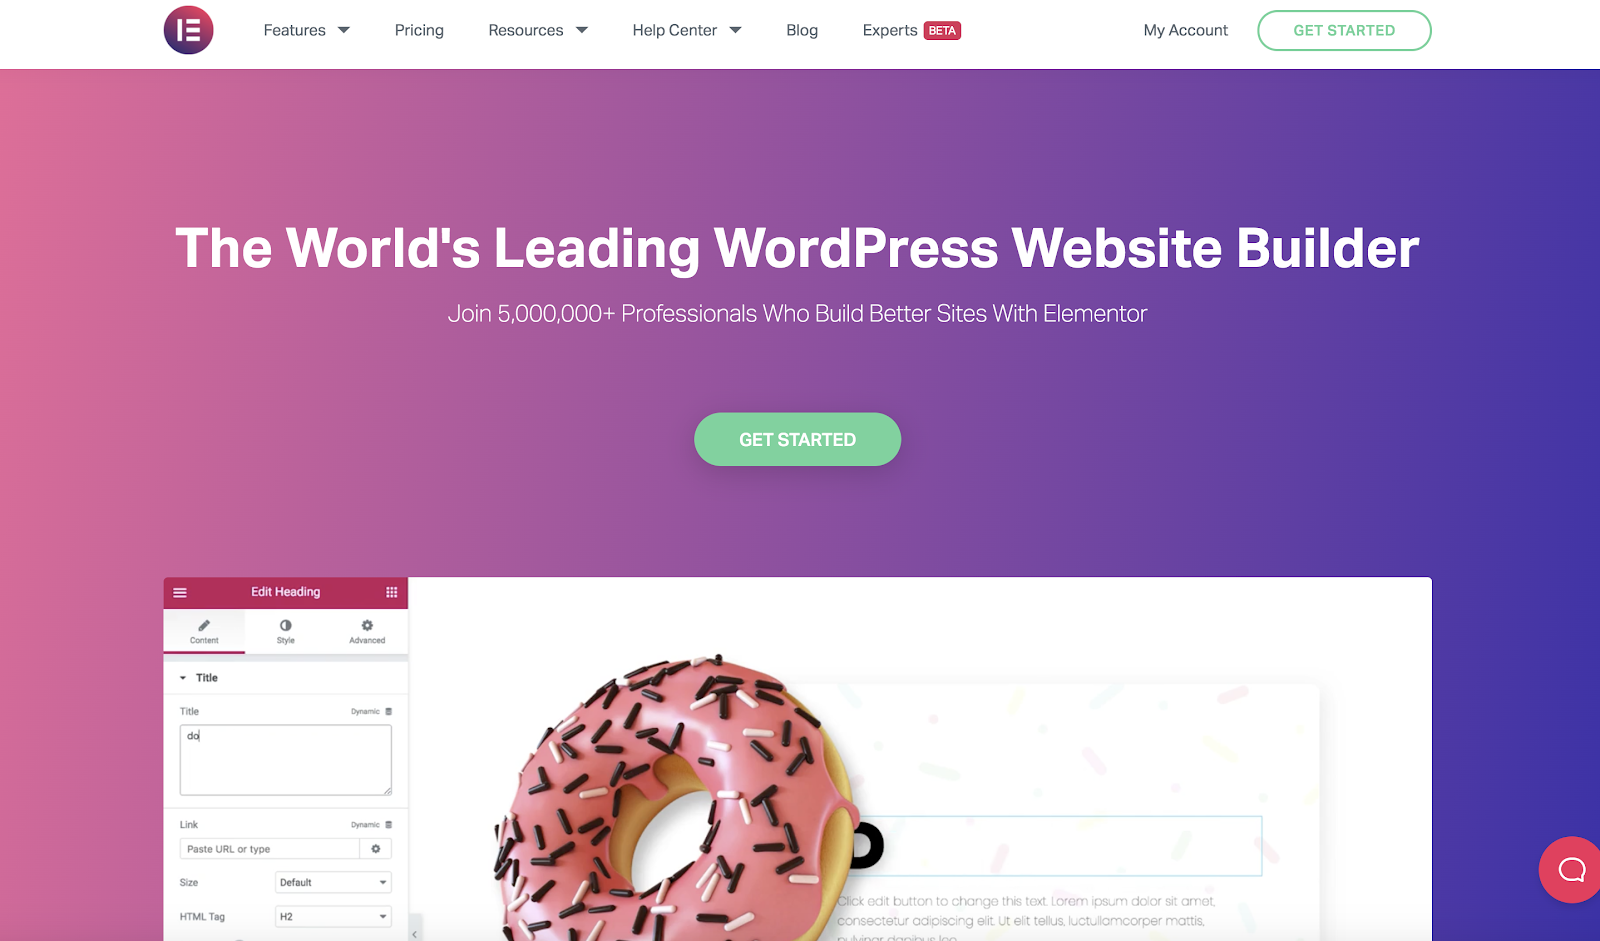 9. LandingiIn my opinion, Landingi is one of the most underrated landing page builders. First off, it's easy to use. Additionally, they've got a powerful assortment of features, including a mobile-friendly design editor, pop-ups and lead capture functionality that you can use anywhere on your site, a ton of integrations, and optimization and testing capabilities in-app. Plus, this tool was built as a mobile-first landing page builder. It can often be frustrating designing mobile-friendly pages, so if that's a concern for you, you should consider this tool. Finally, if you're a WordPress user, they have a great WordPress plugin to help get you up and running. Pros
Cons
Pricing: Starts at $47/month 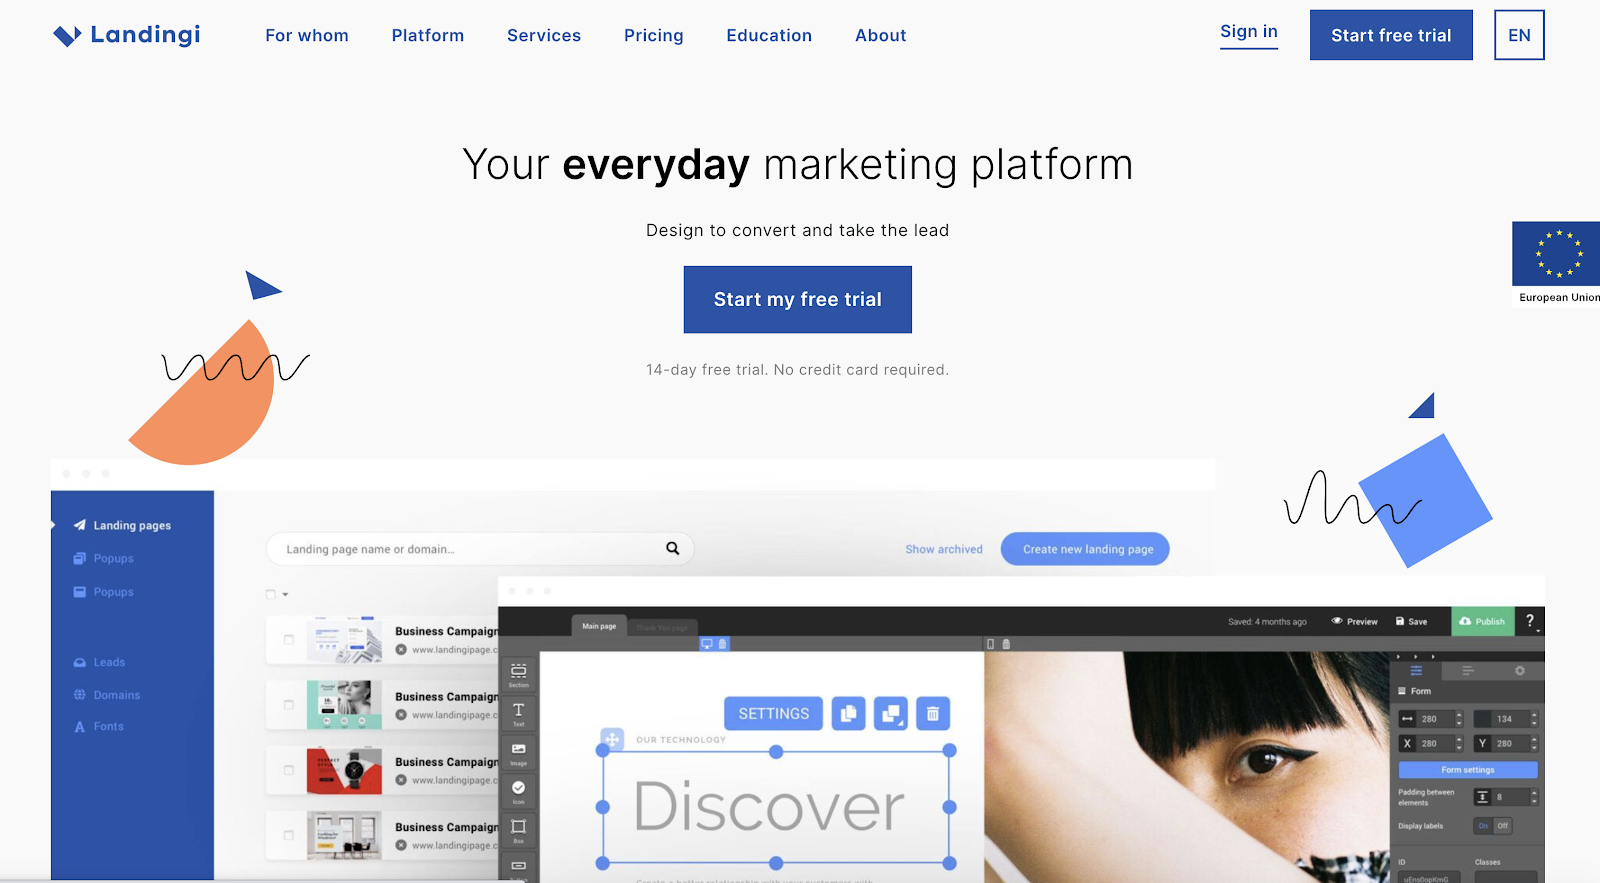 10. OntraportOntraport is another all-in-one marketing solution. It starts with the Ontraport CRM, where all your data lives. Then you have email and SMS tools to communicate with your prospects and your customers. And of course, you have a great landing page builder. This also comes with embedded web forms and membership sites, which makes this a wonderful alternative to ClickFunnels. Pros
Cons
Pricing: Starts at $79/month 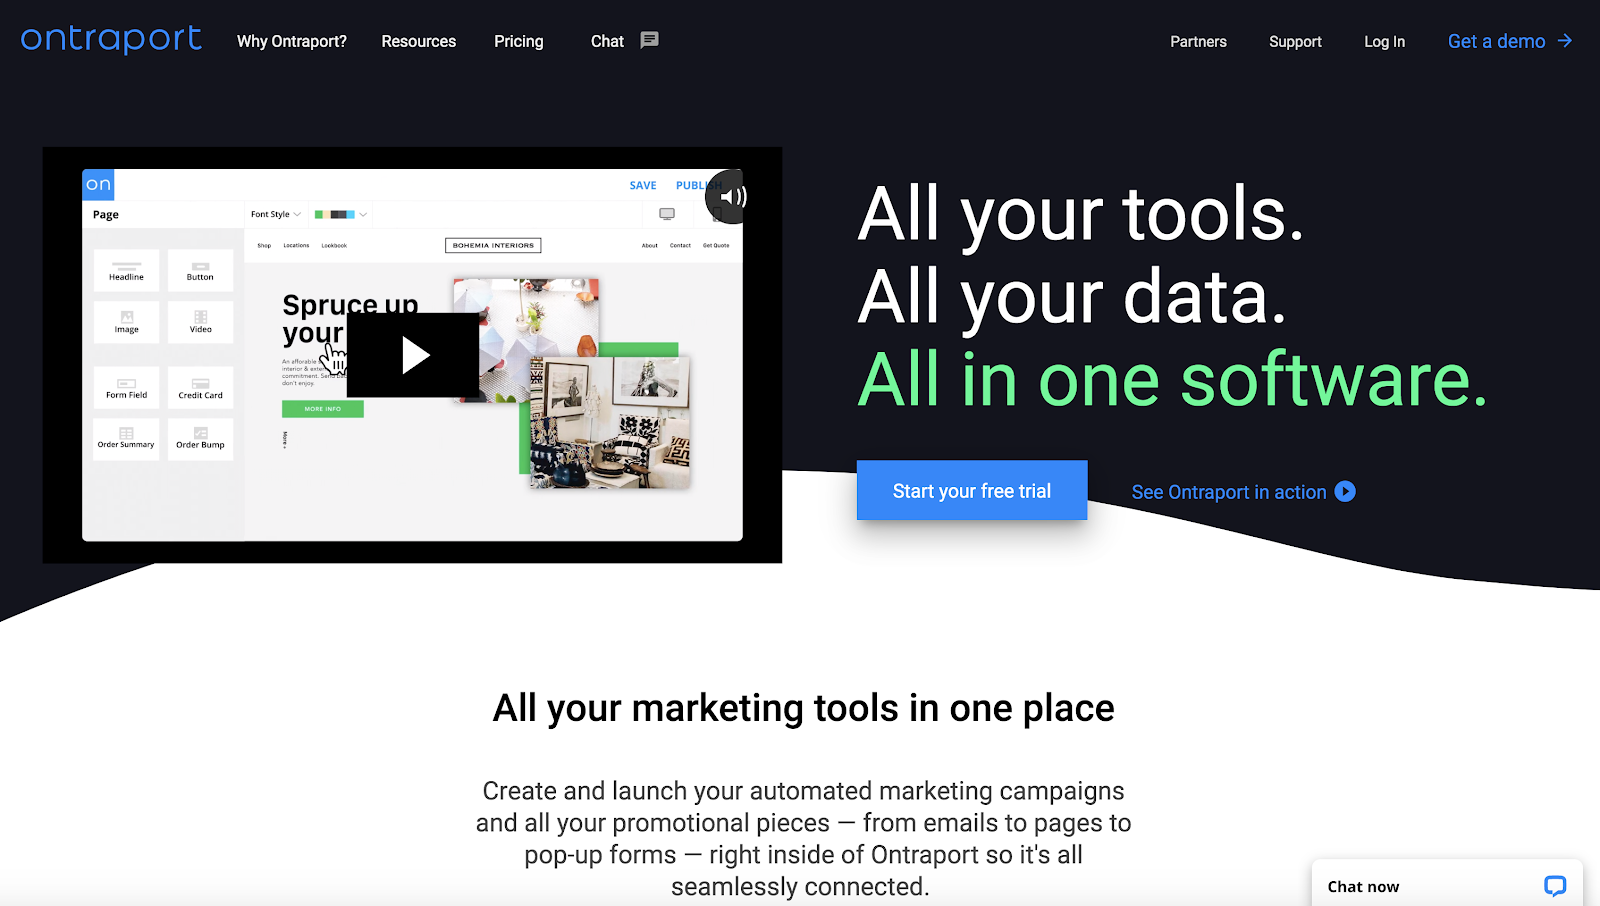 11. PagewizPagewiz is a dedicated landing page builder — and a powerful one, at that. They're a product-led company, putting tons of resources into building a secure, easy-to-use, and flexible page builder. Therefore, if you want best in breed for your landing pages, this is a good bet. Pagewiz comes replete with every feature you need to build perfect pages — a mobile responsive editor, good A/B testing functionality, video widgets, design features like parallax scrolling, and tons of ready-to-use templates. You can also integrate with pretty much any other marketing tool you're currently using. Pros
Cons
Pricing: Starts at $29/month 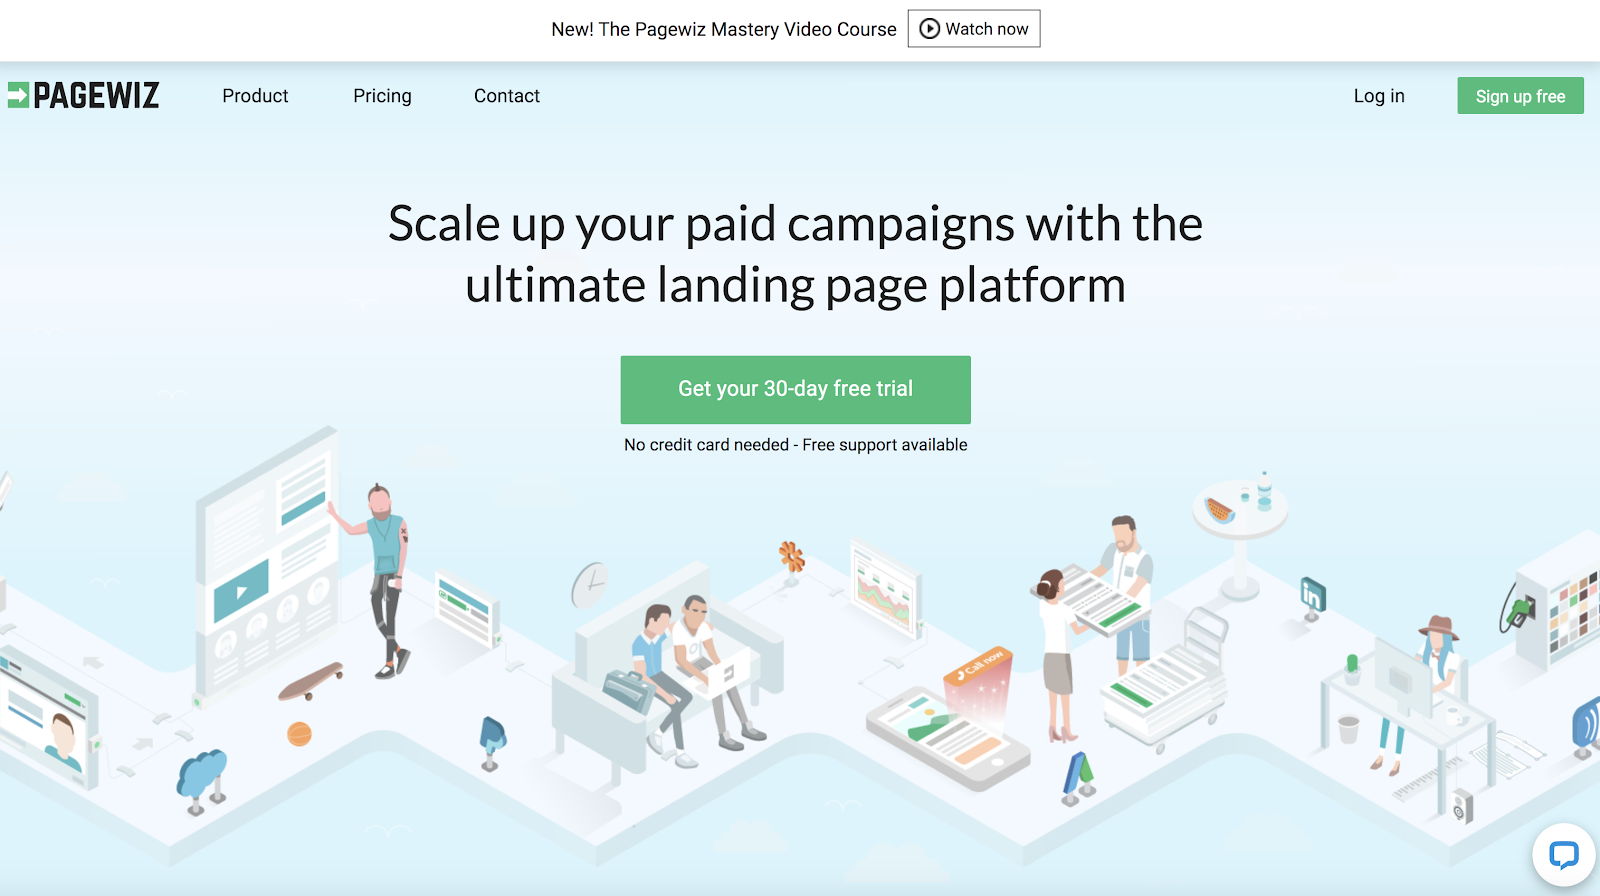 The 5 Best Free ClickFunnels Alternatives1. HubSpot Marketing Hub 2. Elementor 3. Wix 4. GrooveFunnels 5. BuilderAll Finding the Best ClickFunnels AlternativeWhatever your reason for seeking a ClickFunnels alternative, know that there are many options on the market now and there will likely be more in the future. The marketing technology landscape continues to expand, not only giving marketers more options, but better and more powerful tools as well. Some tools on this list serve specific purposes, such as landing pages (Unbounce, Instapage, etc.), but some have all-in-one platforms that have all the features ClickFunnels has, and in some cases, many more. For an all around effective growth platform, HubSpot's Marketing Hub is a great solution. You can start out free on many of the tools, including the landing page builder, form builder, CRM, and email marketing platform. Beyond that, the paid tiers increase the scope and power of what you're able to accomplish. The sky's the limit. [Read More ...] from https://blog.hubspot.com/marketing/clickfunnels-alternatives In 2020, brands are leveraging virtual events more than ever. And, although some marketers once believed that "webinars were dead,” many are now rethinking that statement as they find themselves scheduling and promoting this exact type of event. Webinars, or online events often modeled like a class or seminar, often include a lesson, slide deck, interactive elements such as polls, and, occasionally, time for audience members to virtually ask questions. Because of their educational format, webinars can offer a number of great perks to brands. First, you can build a sense of credibility by hosting a webinar on a topic your company has expertise in. Second, webinars can enable your fans to interact with you digitally. Lastly, and most importantly, webinar signups can lead to a bigger contact list, more prospects, or purchasing conversions. But webinars aren't always easy to plan and execute. Because webinars require viewers to sign up and remember to tune in, it takes clever marketing to ensure that a large audience actually attends. Additionally, with most brands going virtual in 2020, a number of competitors in your space might very well be planning a similar webinar that your audiences might be more drawn to. Luckily, by researching your target audience, and learning more about what drives attendees to sign up for webinars, you can create and promote an event that effectively pulls in and delights your audiences. So, where do you start? To help you research the best webinar tactics for your brand, I surveyed 400 consumers about their webinar preferences and what motivates them to attend these virtual events. In this blog post, I'll highlight a few key findings that you can keep in mind as you develop and promote your webinar content. What Consumers Say About Webinars in 2020People want webinars that help them explore their passions.When choosing which webinars to sign up for, are people drawn mostly to events that help them elevate their career, or are they attending them for more recreational purposes? To learn more about consumers' motivations for attending a webinar, I asked 400 consumers, "Which webinars are you most likely to attend in 2020?", 27% chose, "Webinars that teach me more about a passion or hobby;" while 24% chose, "Webinars that entertain me." 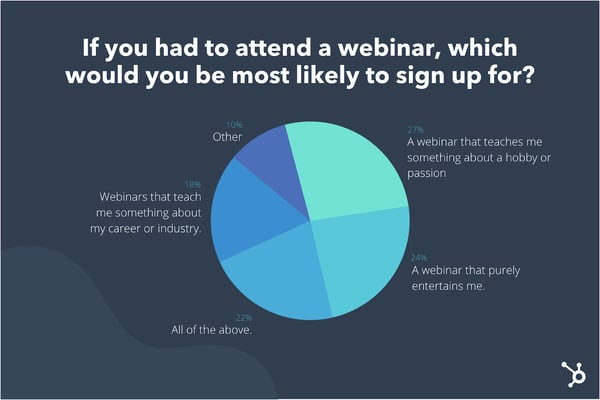 If you have a webinar strategy or series that aims to help people boost their careers or work tactics, don't panic. Nearly one-fifth of the group (18%) said they wanted to attend webinars that helped them learn more about their career or industry, while 22% said "All of the above." These results indicate that consumers will definitely still sign up for a webinar that tackles career, work, or industry-related topics. Additionally, you should also keep in mind that this survey was delivered to a small general consumer pool of all ages and career levels. Had this been given primarily to executives or B2B business reps, the results might have leaned towards industry-related content. Regardless of what industry you're in, or the size of this survey pool, marketers should keep the data above in mind when creating and promoting a webinar. Because people are naturally curious and want to learn, your webinar promotions should intrigue them by clearly stating what they'll learn, noting any experts that might be featured, and highlighting how attendees will be able to use the knowledge they'll gain from the event. Webinar viewers sign up to learn something -- but prefer certain teaching styles over others.Just like any in-person class, each professor -- or webinar host -- might have a slightly different teaching style. While some hosts might come in with a great slide deck presentation, others might bring in an expert and have the audience ask them questions. Or, they might bring in a few experts and host a panel discussion where the audience just listens rather than asking questions. There are many ways to format an informative webinar, but which teaching style actually intrigues people enough to get them to sign up? When I asked, "Which webinar format sounds most engaging to you?", 30% of participants said, "A presentation that teaches me how to do something specific." Meanwhile, 20% said "All of the above." 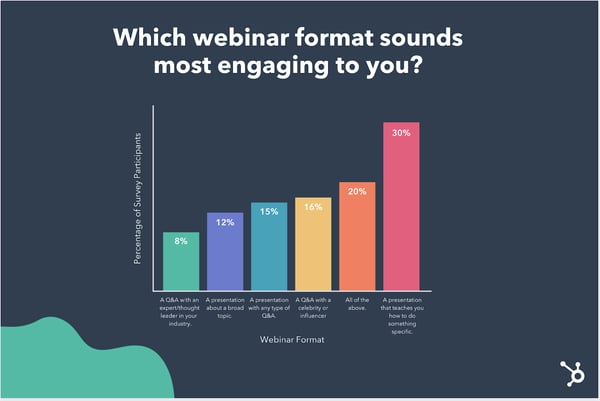 The results above hint that a simple how-to webinar with fewer frills could still engage audiences if you're feeling low on bandwidth and creativity. However, if you have the time to coordinate a webinar that feels more like a live Q&A, this could also be a great formatting option. 39% of people said they were drawn to one of the webinar formats that included a Q&A. Although a more basic presentation or lecture styled webinar will still catch the attention of potential viewers, content marketers should still make sure their presentations educate audiences on something specific -- like a strategy -- rather than discussing an incredibly broad or very vague topic -- like an entire industry. Only 12% of respondents say they're driven to webinars that will feature a presenter discussing a broad topic. Odds are, a person attending a webinar already knows the basics of their hobby, industry, or passion. But, they want to learn more or become an expert at something related to it. For example, as a content marketer, I might not attend a webinar with a broad topic of "Marketing," but I might attend webinars like, "Advanced Blogging Tips from Managing Editors," or "The Basics of SEO in Marketing." As a marketer or webinar creator, you'll need to build a buyer persona for your target audience to determine the best expertise level to create valuable content around. If your audience is filled with beginners in a topic, you might want to create more granular webinars that discuss basic tasks or tactics. If your audience is made up of topic experts, your webinars might need to be more advanced. Interactive Content: The Key to an Engaging Webinar?In the modern classroom, teachers will often zest up a number of different class outlines by adding opportunities for students to interact or test their knowledge. These could include polling the class by asking them to raise their hands, pop quizzes, or allowing them to ask questions. When it comes to online events, a number of tools and video software enable marketers to make their webinars more interactive and engaging. And, based on our research, it seems like consumers enjoy interactive webinars. When asked, "Which element would you most like to see in a webinar?", "A host or presenter that takes questions from the audience," received 22% of the votes, followed by "No preference as long as the webinar feels interactive," with 19% of the votes. Another 20% say they'd like to see polls or quizzes. 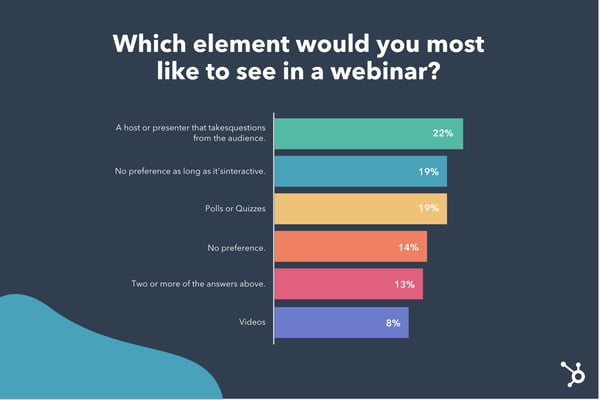 If you're a marketer who regularly creates webinars, it might be worth it to consider where you can make your programming more interactive. For example, if you're hosting an expert, consider leaving time for the audience to ask questions in the webinar tool's chat area. Or, if you're discussing a strategy that's common in your field, poll your audience to see if they've used the tactic. Although polls or Q&A might seem like a super basic webinar element, they might make your audiences listen more actively and enjoy the content they're consuming more. This ultimately could lead to them engaging more with your brand, signing up for future webinars, or converting to a customer. If you're marketing a webinar that has interactive content in it, be sure to promote that aspect. For example, in your messaging, emails, and follow-up emails, directly tell your audiences they'll be able to actively participate in quizzes, polls, or a Q&A during your event. In a competitive webinar pool, anything you can do to make your webinar seem more active and engaging than others that are more basic could help boost signups and attendance during the actual event. Creating and Promoting a Successful WebinarWhile creating a unique and engaging webinar will be one crucial step in your virtual event strategy, the proper promotional tactics will also be vital. Once you've created a webinar plan that will inform audiences, allow them to interact with you, and fuel your contact list, be sure to promote all of the great things your online event will cover. As you promote your webinar, don't forget to note aspects that will make your event stand out -- such as polls or Q&As. This transparency will show audiences exactly what they can expect and differentiate you from competitors with vague webinar promotions. To learn more about creating a truly compelling webinar, check out this ultimate guide. Want to learn how to promote your next online event? Here are a few great tips from HubSpot marketers. [Read More ...] from https://blog.hubspot.com/marketing/why-consumers-sign-up-for-webinars I'm a little embarrassed to admit this, but checking Instagram is one of the first things I do in the morning. But, I know I'm not alone. Did you know that Instagram went from one million users in December 2010 to over one billion in 2020? In fact, it's one of the most popular social media platforms in the world. So, you might be wondering, "How can I use this platform?" Well, a great way to engage with your audience is through an Instagram poll. According to HubSpot research, quiz or poll stickers are one of the most popular Instagram Story formats. Polls are a great way to keep in touch with your audience and even conduct market research. In this post, let's learn how to set up a poll on Instagram and discuss how you can use this feature. 1. Open Instagram and swipe left.To get started with Instagram polls, the first thing you need to do is open the app. Then, you'll swipe left. This will take you to the screen where you can post on your Stories. 2. Make sure you're posting to Story (underneath the record button).Once you're here, make sure that you're posting to your Story. Underneath the record button, you'll see whether you're posting a Story, a Reel, or going Live. To post a poll, make sure you're posting to your Story. 3. Take the video or picture you want to post.Now, just take the video or picture you want to post. If you have it saved, you can just select the content from this screen by clicking on the picture icon on the bottom left. This will take you to your camera roll where you can select a video or image. 4. Click the sticker icon on the top right.To add the poll, click on the sticker icon on the top right. It's the third icon from the left. 5. Scroll down and choose poll or look for the sliding poll.Now you should see different sticker options including location, time, questions, and more. Scroll down and choose the poll icon. You can either do a question and answer poll, or a sliding poll. To choose a sliding poll, you'll want to scroll until you find the slide bar option. 6. Type in the question and responses.If you chose the question and answer poll, it's time to type in your question and the possible responses. If you chose the slide bar, you'll want to type in your question and then add an emoji to the sliding bar. 7. Click "Send To" and then share your poll to your Story.Now all that's left to do is post. To do this, just click "Send To" and then share the post on your Story. 8. Track results.Once you've posted a poll, it's time to wait for the responses. To view the results, you'll want to watch your Stories. Then, click the "Seen by" icon in the bottom left corner. This will show you who voted and the results. Here, you'll also see a button to "Share Results." You can click that and post the results to your Story to let your viewers know the outcome of the poll. When you're creating a poll, remember to place it strategically. You don't want people to have problems voting because of the placement. Make sure your poll is placed near the center, and not too high or low that the other Story icons block it. As you can see, posting a poll on Instagram is a simple process. But, how do you use this feature? Here are some of the top ways you can use Instagram polls:
Ultimately, the point of using Instagram polls is to engage with your followers and capture their attention. To learn more about Instagram marketing, you can take HubSpot's Instagram Training course. [Read More ...] from https://blog.hubspot.com/marketing/how-to-poll-instagram As a consumer — and a marketer — one of my favorite brands to watch is Taco Bell. In the last five years or so, Taco Bell has begun making strides in its brand messaging. The brand has reinvented itself on social media, introducing a new, bold personality. With its food, packaging, marketing campaigns, events, philanthropic efforts, and interior design, Taco Bell reinvented itself into a full on lifestyle brand. Doing this — telling a compelling brand story through messaging — isn't easy. Marketers need to have an entire brand identity to communicate what their business does, what it's about, and why it's different. Oh, and it needs to resonate with people and strengthen your company's values and reputation. This is because, according to research from Bergische University, brands produce similar feelings as the ones we feel when we like someone. So, we actually feel similarly about brands as we do about people. That's why marketers need to craft brand messaging that their audience can relate to. Below, let's review brand messaging — what it is and a framework to get started. It's how your consumers can have a relationship with your brand. Ultimately, it's the culmination of language, design, events, and philanthropic efforts that tell the story of who your brand is. So, how do you get started crafting brand messaging that your target audience will love? You need to know two things like the back of your hand: your target audience and unique value proposition. Then, you can begin to write out a brand identity that'll help your company make all its marketing decisions. Would a brand that cares about "X" do this? Would a brand that's motivated by "Y" sell this? Your brand identity will inform your company's behavior because it'll tell you why your brand matters, what it stands for, and why it's different from other brands. A brand identity that your audience relates to and has a personality — or talks to your audience like a friend — is how you'll continue to remain relevant to your consumers and create loyal customers. Brand Message FrameworkWith a full understanding of brand messaging and creating a brand identity, you might be wondering, "Now what? How do I get started?" And it's a fair question. That's why we've created a brand message framework that you can use to begin crafting a brand message or identity. 1. Figure out who you are.To get started, your brand message needs to answer these questions:
While you're answering these questions and beginning to map out who your brand identity is and what your brand messaging will look like, remember that your brand message answers the question, why? Why does your audience care? 2. Know your audience.Now that you have a better idea of what you offer and who you are, you need to understand who your audience is. If you haven't already, create buyer personas that represent who your customers are and their goals. This will help you find alignment between your brand and your consumers. 3. Start a document that explains your brand message.After you've answered the questions above and written out your personas, begin compiling this information in a document that explains what your brand message is, your unique value proposition, and key themes that are core to your brand identity. Then, start to figure out how your brand identity relates to your buyer persona. What are the patterns and what do they have in common? This is how you'll make decisions on brand messaging. You'll see what your audience cares about that align with your values and can derive messaging opportunities. 4. Brainstorm messaging opportunities.With a clear document that represents who you are and who your audience is, you can then begin to look for messaging opportunities. How can you relate your current campaigns to your brand message? How can you use content to convey your values? Once you have an idea, you can create a tagline that communicates who you are and your unique value proposition. At this point, you should have created a brand message and identity that'll inform your messaging. Now, we wanted to review a few tips for creating messaging that stays true to your brand:
1. Taco BellAs mentioned above, Taco Bell has started to create a reputation for its strong, funny brand. If you tweet them, they will likely respond with a humorous comment. The goal is to be so relatable that customers love to interact and talk about Taco Bell. When people are talking about you and with you, they're more likely to be loyal customers. Below is an example of a tweet that represents Taco Bell's brand identity and messaging. They respond to tweets like a sarcastic, funny best friend would.
2. TheSkimmTheSkimm is a daily newsletter that aims to quickly inform young women of current events. The brand is known for having a bold, witty personality similar to that of its target audience — millennial women. The goal? To mirror its target audience. Act like the fun, irreverent best friend to help readers get started with their day. In the tweet below, theSkimm stays true to its brand messaging and identity by starting off with a sharp, witty comment on Congress.
3. ProclaimProclaim is a lingerie line that is "expanding the definition of nude, one ethically made bra at a time." They tackle the lack of inclusivity in women's undergarments by creating products for all skin tones, and they do it with sustainable, Earth-friendly products. This value proposition is combined with their messaging, which celebrates diversity and nature.
4. FabFitFunWhen I think of FabFitFun, I think of trendy products that are popular with self-care influencers. The brand has cultivated a following by partnering with influencers on Instagram who are trendy, fashionable, and take care of themselves. And this image of self-care and trendy products is carried out through its content as well. Below, the company tweeted its blog about trendy tech accessories. This type of content is right in line with the brand messaging consumers hear about on Instagram.
5. Trader Joe'sTrader Joe's is a grocery store that has created an almost cult-like following through its brand messaging. They are a fun, cheap, organic food store with a small-town, neighborhood feel. For example, they even put out an old-fashioned newsletter called the "Fearless Flyer." This includes product roundups and recipes. The content Trader Joe's puts out reinforces its brand image as a small, neighborhood grocery store. With brand messaging that is consistent with its unique value proposition and personality, customers relate to the brand as if it were a person.
6. Taylor SwiftBesides the fact that Taylor Swift is one of my favorite singer/songwriters, I had to include her because her brand messaging is on point. From the time she was 16, Taylor Swift has used social media and brand messaging to connect with her fans. This is another example of someone who has created a cult-like following through brand messaging. Taylor Swift's brand is that she's like the girl next door, something her audience relates with. In the example below, someone on Tumblr posted a tweet on Swift's birthday, and Swift responded like … well, like the girl next door. A fun, outgoing best friend you can easily talk to on social media.
7. Hillary WeissLarge brands have more resources to invest into branding and awareness, so this list would not be complete without at least one personal brand (since I'm not sure that Taylor counts). Hillary Weiss is a great example to look to if you want an example of brand messaging that speaks directly to prospects. Her personality literally jumps off the page...
... And it's her goal to make others' do the same with their brand positioning and copywriting. She comes right out and says it on her website: "I'm Hillary Weiss, and I turn small businesses like yours into HUGE obsessions. Since 2011, I’ve helped thousands of personality-fueled brands define their Statement Piece — a.k.a. the big idea that makes them unmissable in their market, and radically relevant to their perfect people. Now it’s your turn. Let’s get loud (and rich) together." 8. LoomGood messaging often comes down to conveying value to your target audience and why you're doing what you're doing. Loom is a great example of this, and it helps that they have an amazing product. Their homepage says, "Say it with video" along with their tagline: "The expressiveness of video with the convenience of messaging. Communicate more effectively wherever you work with Loom." The rest of their website backs up the assertion with facts to provide their point. For example, "You talk up to 6 times faster than you type" and "Video conveys emotion and tone of voice that text simply can't." Even better, their brand messaging is further underscored in the testimonials of brand evangelists who truly believe in this value:
9. DoveBranding goes so further than what you sell and why it's valuable. Dove recognizes this by making their brand about more than just having the best soap and care products. To them, their products mean enhancing the natural beauty of their customers and (more importantly) that beauty should be "a source of confidence, not anxiety."
That's why Dove invests into realizing that mission with their Self-Esteem Project and taking a different approach with their advertising than simply discussing the features of their soap. 10. Métier Brewing CompanySpeaking of missions, Métier Brewing Company, founded in 2018, isn't just a brewery; it's an organization that's embedded in the community (and that means making the community better). According to their website, "Great beer should be for everyone, and we don’t just mean the people drinking it. At MBC, we brew beer with everybody in mind: the suppliers who produce our ingredients, the brewers brewing, the staff who serve pints, and the broader community enjoying the beer." They embody this mission in all facets of their business from their beer hall and event space for hosting concerts and family gatherings to their support of The Major Taylor Project (an after-school bike education program to foster a sense of belong and empower youth, particularly those from underrepresented communities).
Your personality and values should be evident and align with that of your audience. Your brand message is something that's strategically created to help you stand out and relate to your customers. For this reason, it can make a big difference in how you're perceived by prospects (and whether or not they want to do business with you), so start building your brand today. Editor's note: This post was originally published in December 2019 and has been updated for comprehensiveness. [Read More ...] from https://blog.hubspot.com/marketing/brand-communication-strategy By now, you've probably heard video marketing is a powerful tool for generating leads and capturing new customers. So why aren't you using it yet? For many small to medium businesses, the reluctance to adopt video comes from a fear of the unknown. Video marketing feels expensive, cumbersome, and difficult to track. And these would be valid reasons … if any of them were still true in 2020. Video technology has come a long way in the past few years. We've gone from "put it on YouTube and hope the millennials find it" to video enablement platforms which empower small businesses to create, share, and analyze videos without the agencies, actors, or expense. If you haven't seen what video can do for your company, it's time to stop putting it off. In this post, let's review the top video marketing myths. 5 Video Marketing Myths, Debunked1. Video is too expensive.Sure, HBO's Westworld may have beaten The Game of Thrones' record with a price tag of $10 million per episode, but you don't have to play their game. In fact, stay as far away from it as possible. Video doesn't have to be expensive. Today's buyers and consumers actually appreciate authenticity over production value.
This craving for authenticity is why we're seeing such an explosion in micro-influencer marketing and user-generated content. With both of these marketing strategies, brands rely on their own buyers to create content, usually with little more than an iPhone. With your own video content, don't stress over having a low production budget if you have something valuable to say. For example, Vidyard produces Chalk Talks where they ask experts within their company to chat about topics like outbound sales, analytics, and video strategy in front of a chalkboard. The videos have been shared thousands of times, and the cost? A few minutes of someone's time and a lot of colored chalk. 2. Video is cumbersome.What many small business owners typically mean by this is "I don't know where to begin." When they think of video, they imagine a time-consuming process of coming up with scripts and storyboards, procuring actors and equipment, and hiring someone in jockey pants to operate the clapperboard and shout, "Action!" Yet modern video marketing is worlds apart from Hollywood and requires a lot less effort.
Today, most iPhone cameras rival all but the top-of-the-line DSLRs and video equipment and are a great substitute. You can easily capture videos of yourself, your office, events, and customers giving off-the-cuff testimonials when your sales and account teams pay them a visit. And when it comes to actors, don't worry that you can't afford Gal Gadot: you don't need her. Your employees will do a far better job because they actually know your products, your customers, and the details of your industry. After the initial awkwardness of seeing themselves on camera fades, you'll have all the actors you need. And finally, not everything needs to be scripted. Writers are great and preparation has its place, but a lot of great content can be created with little or no forethought. Take entrepreneur and internet personality Gary Vaynerchuk, for example. He built a media empire from selfie videos recorded on his mobile phone. The below video of him giving advice to young entrepreneurs might be what the internet would call "potato quality" but it still gets the powerful point across. If you feel like you don't know where to start, HubSpot's Video Marketing course can serve as a great guide to helping on your way. 3. Our industry doesn't really use video.What most brands hopefully mean by this one is "our industry doesn't use video yet." Video is industry agnostic and the demand is being driven not by businesses, but the people who work within them. Remember, both B2B and B2C are really just B2H (business-to-human), and humans love video. One need only look at the numbers for a reminder:
, where agencies are suddenly embracing everything from drone flyovers to virtual reality walk-throughs. To see similarly outsized gains ask yourself,
"What would the people who make up our customer base, business or otherwise, like to see?"4. Video is hard to track.Videos can indeed be difficult to track, but only if you're using a bare bones video hosting platform like YouTube or your website's video feature. These platforms only show you total video views which is like measuring your website's success based solely from visits. What if 95 percent of your video's viewers dropped off in the first three seconds? You'd never know. A true video enablement platform, on the other hand, can give you insights into how people watch your videos, who they are, what they liked and didn't like, and what they did afterward. You see, video has some unique characteristics that make it highly trackable. Because it's linear and people watch it from end-to-end, video enablement platforms, like TwentyThree and Wistia, can tell you what parts viewers watched, where they skipped, and where they revisited. From this, you can automatically infer an individual's interest in particular products or value propositions that appeared in the video. And, with CRM and marketing system integrations, you don't have to spend all your time on these analytics. You can trigger actions based on how your viewers watched the video. Did they only complete 25 percent of it? Better send them a different video. Did another viewer rewatch the part where the product is shown over and over? Better ping your sales team because you might have a qualified lead on your hands. 5. Video doesn't have enough uses.Of all the excuses, this one invariably makes our editor cough and spit out her coffee in surprise. Video is perhaps the most dynamic and repurpose-able type of content that you have: It increases open rates for email, boosts click through rates for landing pages, encourages shares on social media, increases time on page for websites, and drives more leads than text alone. And, with a great video editing platform, you can optimize one video for all channels. A good video editing platform provides small to medium businesses with the tools they need to easily cut up, edit, and optimize one video into many formats for many channels. This scales easily because users can easily A/B test videos just as they would an email and can render dynamic content to personalize videos to viewers, such as inserting logos, names, or even swapping out different products. With the right tools, video has more uses than you'll know what to do with. Video is easier than you think. Once you have the epiphany that unscripted and low production value videos are both desirable and trackable, you'll also realize that it's useful for more than just marketing and sales. You can use video in your customer support to demonstrate how to use your product, in your internal communications to update your remote teams, and as a way for people within your company to communicate on a day-to-day basis. So, knowing that video isn't nearly as expensive, difficult, or untraceable as you previously thought, are you ready to stop putting it off? Editor's note: This post was originally published in August 2017 and has been updated for comprehensiveness. [Read More ...] from https://blog.hubspot.com/marketing/myths-about-video-marketing-debunked Instagram is an undeniably powerful marketing tool, but with over 25 million businesses on the platform today, it's critical you take the time to create well-designed and thoughtful Instagram posts to stand out. You'll need to apply a strategic design plan to your business's Instagram to attract a loyal following and find success on the app, long-term. However, creating a clean and cohesive Instagram feed takes design skills you might feel you lack. Plus, Instagram's algorithm favors brands that post at least once a day — that time commitment could be adding to your stress. If that's the case, you're in luck — there are ways you can create pre-made Instagram post templates, so you've got a stash ready-to-go. Plus, by ensuring you use the same templates for different posts, you'll have an easier time creating a cohesive and aesthetically-pleasing feed. 1. Use Instagram Post TemplatesLet's face it — you don't always have the time, resources, or personnel to design noteworthy Instagram posts. That's why we recommend using Instagram Post Templates for Business which you can build from and customize. Here are some options to create and save Instagram post templates, so you can have stunning posts on-hand whenever you're ready to publish.
Featured Resource: 16 Free Instagram Post Templates for Business Need templates to get started? Download HubSpot's free Instagram post templates for both traditional posts and stories, which you can tailor as you see fit when it comes to your brand. You can alter any and all parts of the template – the image, the copy, and the design elements – to ensure you're publishing posts to grow and engage your follower base. 2. Choose Your Post FormatWhile traditional Instagram posts to your permanent timeline are more long-lasting and allow for comments and likes, you shouldn't underestimate the power of Instagram Stories, which can be used for more immediate needs and occasions. In fact, 500 million accounts use the Instagram Stories feature daily. So, when you're creating your post, ask yourself if it warrants publication as a story or as a traditional post. 3. Choose an ImageMaybe you've decided your post doesn't need a photograph and that text overlay on a solid-color background will work for you. If that's the case, hop over to the next step. If you've decided you do want to use a photograph – particularly if you want one as the background for text overlay – you've got a few options.
Whichever photo you do decide to use, simply replace it as the background for the template you're using in the HubSpot Instagram Post Template collection and resize the photo so it's to your liking (and is good quality). 4. Add Design ElementsInstagram post templates come with design placeholders for text with special fonts and other elements. Your next step is to alter, add, or remove any elements that you see fit. This includes updating the copy so it reflects the information you want followers to know and/or the action you want them to take. 5. Save the PhotoWhen you've done all you can in the template builder of your choosing, save your photo to be posted on Instagram. All you'll have to do here is click "File" > "Download" > "PNG Image" or "JPEG Image." Then, just name the photo file, email or message it to yourself, and save it on your phone so you can post it. 6. Upload to InstagramOnce you have your photo saved, it's time to upload it to share with your followers. For a traditional post, open Instagram, click the "+" button in the bottom center, choose your photo, add any filter, description, or hashtags, and click "Share." (Take a look at How to Post on Instagram: a Step-by-Step Guide if you're still unsure.) For an Instagram Story post, click on the camera icon in the top left of your screen, access your camera roll in the bottom left of the screen, choose your image, minimize the date that shows up to the point where it can't be seen, and add any further design elements – like a GIF or additional copy – to the image. From there, click "Your Story" on the bottom left. Other Ways to Design Instagram PostsHere are some other options to create and save Instagram post templates, so you can have stunning posts on-hand whenever you're ready to publish. 1. CanvaCanva offers thousands of customizable Instagram post templates. To create an Instagram post on Canva, go to Canva's Create a Design page, click "Instagram Post", and then follow these steps: 1. On the left side, you'll see an array of template options — some cost money, while others are free. Choose one.
2. Once you choose a template, click on the text box to write something. There are colors at the top if you want to alternate your text color — you can also change font, size, and spacing.  3. When you're finished with your text, click the background of your image (outside the text box). This will allow you to filter your background, adjust the brightness and contrast of the image, and more.  4. When you're happy with your template, open up the Canva app on your phone. Click on your Instagram post design. 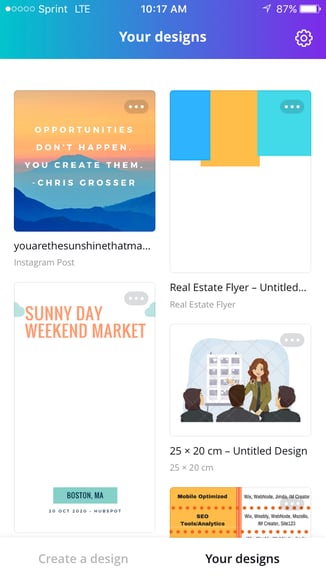 5. Click "Share" in the top right. 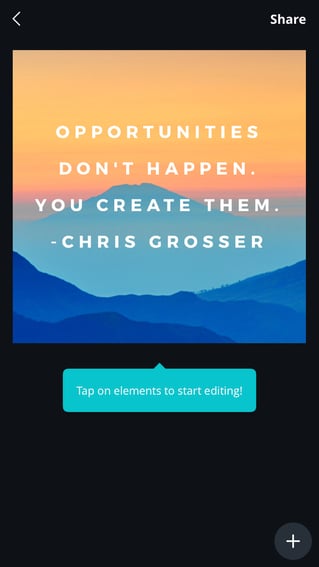 6. Now, you can post straight to Instagram by clicking "Import with Instagram". If you aren't ready to post it, you can also "Save Image" and it will appear in your camera roll for later. 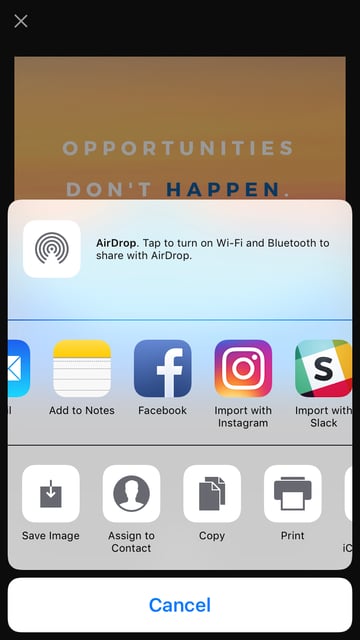 7. If you are immediately posting to Instagram, choose whether you want to upload to your "Story" or "Feed". 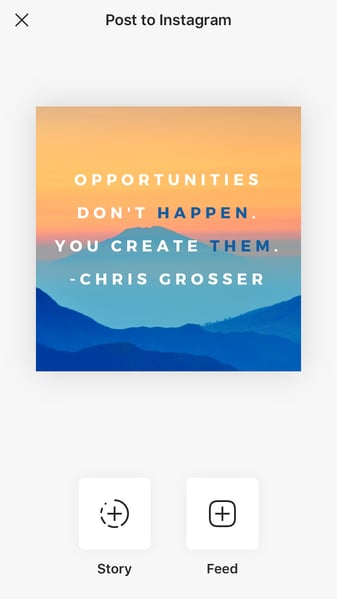 8. Edit the Instagram post like you would any other post — add tags, a caption, location, etc. When you're ready, click "Share" in the top right. 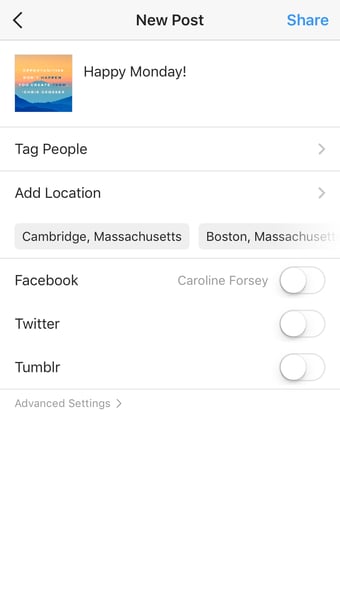 Remember, your template is automatically saved to your Canva account. You can access it in the future, on both desktop and app versions of Canva, and edit it with new text to post the same design again. Alternatively, you might consider creating a few posts now, and then saving them to your camera roll to post them in the future. Besides Canva, there are a few other design editors that offer free pre-made Instagram templates. In particular, here are three tools you might consider: 2. ReciteThisIf you're interested in creating a template for quote posts, it's easy to do — in fact, we've already curated a list of nine apps to help you make quotes for Instagram. For our purposes, we'll try just one — ReciteThis. To create a quote template for Instagram, go to ReciteThis, then follow these three easy steps: 1. Enter your quote in the text box.  2. Below, click the left or right arrows to peruse templates and choose one you like. Once you've chosen a template and written your text, click the "Create" button in the text box.  3. Click "Download Image" to post to Instagram's desktop version, or email it to yourself to post on your phone. 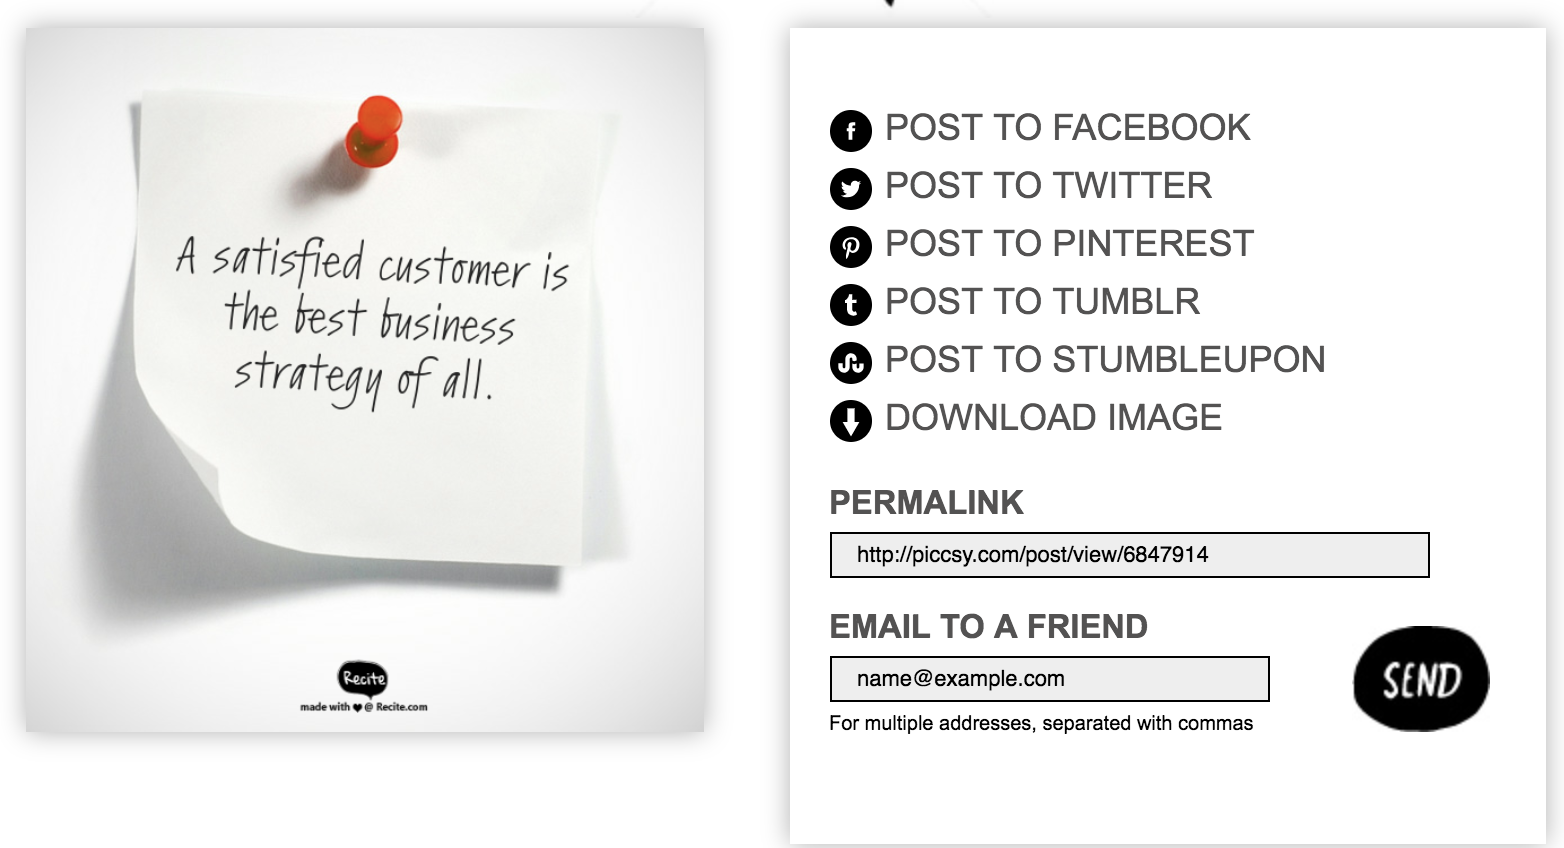 3. Creative MarketIf you're willing to shell out the cash, you might consider buying one of Creative Market's Instagram Template bundles. For instance, you could purchase this 1053 Quotes social media pack. 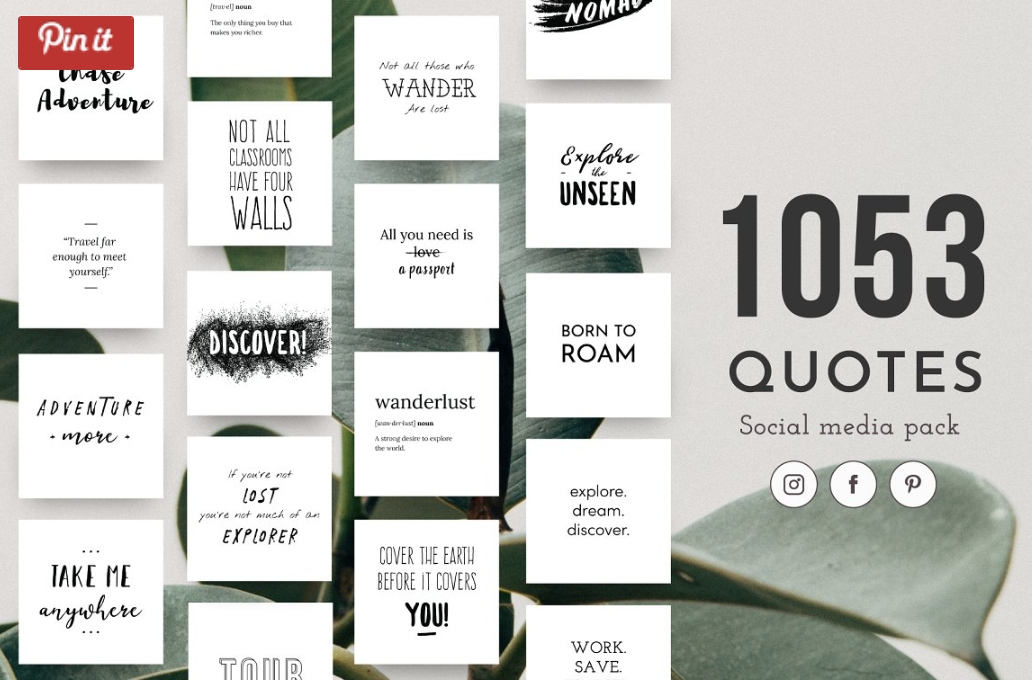 Alternatively, you can purchase a bundle with Instagram Story content, like this Animated Stories bundle. 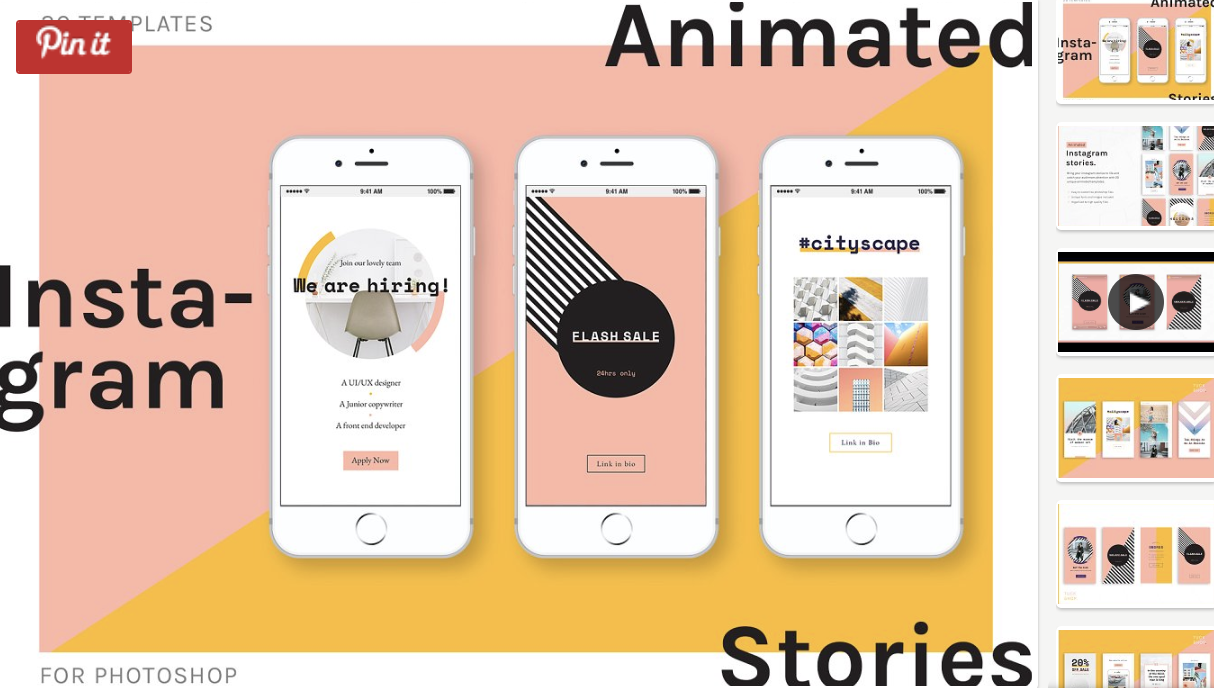 Finally, you might consider purchasing a bundle to help you create a cohesive theme for your Instagram feed, like this The Grid template. 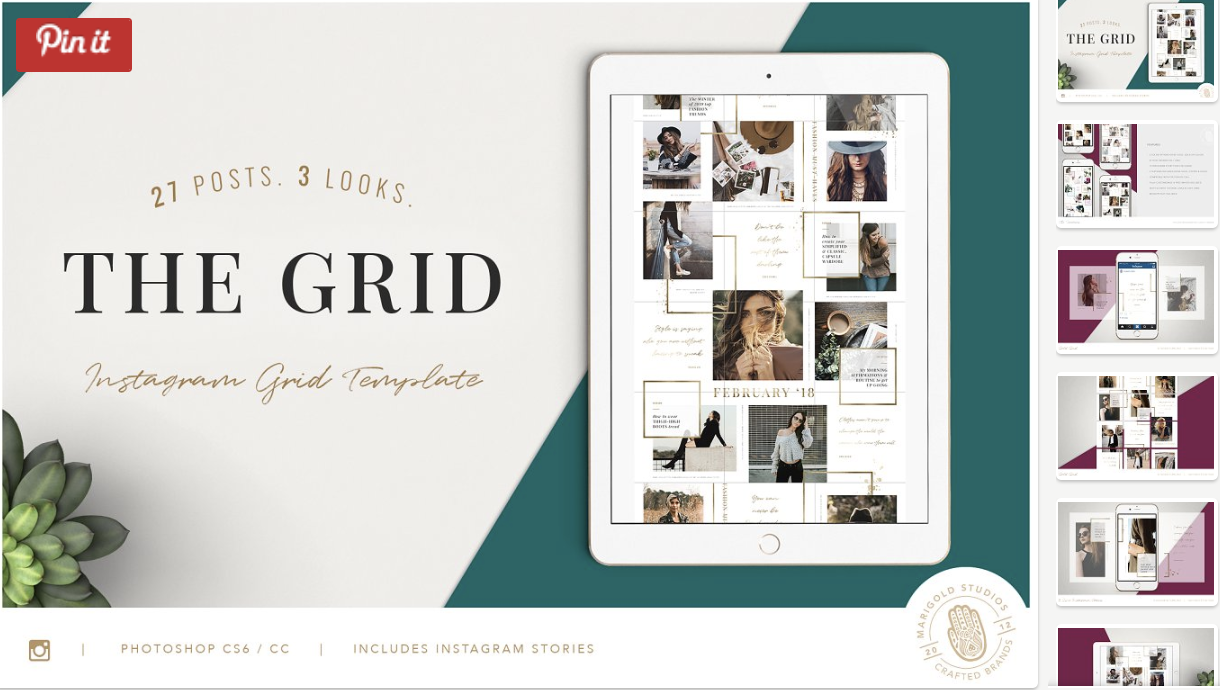 And that's it! You're all set to create and save pre-made Instagram templates, so you can focus on attracting a loyal following without tediously designing a post from scratch every day. Check out our Instagram Marketing: The Ultimate Guide for more Instagram tips and tricks. Editor's note: This post was originally published in October, 2018 and has been updated for comprehensiveness. [Read More ...] from https://blog.hubspot.com/marketing/instagram-post-template At HubSpot, we love brainstorms Getting your team together in one room to come up with ideas not only allows you to identify creative content or strategies that you might not have thought of, but it also can improve feelings of psychological safety as people who might not be high-level managers are invited and encouraged to offer their input. Brainstorming is one of the most productive team-building activities we use at HubSpot. But, recently, when we had to leave our physical offices and embrace remote work, many managers wondered how they’d recreate the same in-person communication, productivity, and sense of psychological safety virtually. Luckily, many of our managers were able to adapt quickly, leading a number of successful virtual brainstorms in 2020. To help managers build solid idea-generation techniques -- even from home -- here are a few steps HubSpot employees on the blog, acquisition team, and DI&B team take when coordinating remote brainstorms. How to Run a Virtual Brainstorm1. Give your team a headstart.If your teammates already know the goal of the brainstorm, the prompts they'll be given, and their idea generation instructions, they'll come ready and eager to immediately make suggestions. Before the brainstorm, consider sending a detailed email or a creative brief about what you'd like to achieve during the session. "I’ve found that giving members of your brainstorm a chance to prepare in advance results in higher quality ideas presented in the brainstorm," says Emmy Jonassen, Sr. Director of Marketing at HubSpot. "A creative brief will also help you make the best use of your time, so you'll focus on the act of brainstorming rather than discussing the assignment." 2. Designate a facilitator before the brainstorm.When you're attending a brainstorm in person, it's easier to determine who's talking, who's being asked questions, and who's running the meeting simply by body language and other social cues. When you're on a video call, some cues can be harder to notice. You might not know who should be answering a question, who you should ask questions to, and who is trying to keep the meeting on schedule. That's why it's helpful to clearly designate a host or facilitator. "The trick to having a great brainstorm is getting everyone involved," Jonassen explains. "A facilitator can help create an environment where everyone feels comfortable chiming in. They can also help keep the conversation going through awkward silences, keep the group on track, and bring people into the conversation who tend to be more reserved." Once you've planned your brainstorm and designated yourself or someone else as a facilitator, be sure to note this information in the brainstorm's creative brief, calendar invite, or at the beginning of the session. If you choose to use breakout rooms -- which we'll discuss in step four -- consider having a facilitator for each of them. 3. Take virtual notes.During in-person brainstorms, it's easy to look down and type on your computer while still talking and engaging with others. But, on a video call, you might want to stare less at your notes and more at your camera so it doesn't look like you're losing interest. And, if you must take notes, you might worry about missing something as you toggle between screens. Because of these issues, notes can get pretty muffled. That's why Alexandra Garnier, a French automation marketing manager, says brainstorm coordinators should, "Either use a virtual whiteboard, a shared online notes document, or (if needed) a designated note-taker." By creating joint notes or designating a note-taker, everyone can have a shared source of information to look back on and can focus on the discussions at hand, When selecting a note-taker, it's best to pick a fast typer or an attendee who isn't tasked with coming up with ideas, such as a co-coordinator. This will allow them to focus on the notes without heavily missing out on a great team activity. 4. Embrace virual breakout rooms.During a large in-person brainstorm, you might be asked to break into small groups, go to another room, and come back with a few ideas to offer from your group. Luckily, many video call tools have been able to mimic this experience with breakout room features. "It’s harder to get everyone to participate if you have more than five or six people involved," Jonassen says. "If I have a big group, I’ll typically use this feature to break people into smaller groups and brainstorm for a set period of time. After that time has ended, I’ll have everyone rejoin the larger group to share their ideas." Garnier similarly added, "If you do a brainstorm with a larger group, it's better to then do breakout rooms. Some people tend to shy away when there are many participants." This can be especially true in a virtual setting, where people might feel uncomfortable speaking up. If you're using Zoom for your meetings and interested in breakout rooms, here's a great tutorial for how to activate them on your next call. 5. Use digital noises and other signals to transition between activities.Some brainstorms might involve a combination of individual and group activities. However, when the ideas are flowing in one task, it can be naturally hard to stop and jump into a new portion of the session. According to Margot Lieblich, a Sr. UX Researcher who coordinates monthly brainstorms and ideation sessions, it's even harder to manage time in a virtual meeting. “Oftentimes in brainstorms, you are on a tight schedule and need to make quick transitions to the next activity. This can be especially hard in a remote setting, when you can’t always visually signal to get everyone’s attention at once," Lieblich says. "Use an audible timer to clearly mark the end of an activity. You can even get creative with the sound," Lieblich advises. "I’ve used the Oscars' theme music, and one of my coworkers uses the sound of a duck quacking." "After hearing the timer once, the group will quickly learn to wrap up and start transitioning to the next activity when they hear the sound again,” Lieblich explains. 6. Include both group and individual brainstorm activities.Some people work better by themselves while others work much better in groups. In a virtual brainstorm, this can become more apparent when those who don't respond to group activities zone out, and those who don't like to give individual pitches will wait until the end hoping they run out of time. By doing two activities, you ensure that everyone can ideate in their own confort zone. "I like to start out with an individual activity so people have a few minutes to explore their own approaches to the problem space without influencing each other," Lieblich says. "After running an individual activity, I incorporate a group activity so people can inspire each other and come up with even richer, more interesting ideas.” 7. Remember, you don't always need to schedule a video call.While you might think all remote brainstorms must happen on video calls, this isn't always true. Yes, many of them certainly will. But, if you're asking teammates to come to a brainstorm prepared with something quick -- like a blog post pitch or a one-off email idea, you might be able to cut a time-consuming video call out of your brainstorming process entirely. Recently, when the blog team was drawing out our quarterly content strategy, we wanted to ask our writers to come up with ideas for blog posts. But, because each writer has an incredibly busy schedule, asking them to come to a very long brainstorm meeting where each person would offer five to 10 post suggestions didn't make logistical sense. So instead, I coordinated a virtual brainstorm that took place completely over Google Sheets. To kick off the brainstorm, I sent my team an email and an Idea Generation Spreadsheet with instructions on what content needs we'd have for the next quarter, how many post ideas to insert on the spreadsheet, and a deadline for submitting post suggestions. From there, writers had two weeks to offer ideas for at least five blog posts. Here's a quick look at the spreadsheet with an example post I gave writers to guide them through the elements of giving a post suggestion:  After the deadline, our editors went in and used the spreadsheet's comment features to give feedback that writers could keep in mind for the next virtual brainstorm. Since this brainstorm, most of the blog posts suggested were added to our content calendar. Planning Your Virtual BrainstormMany of the tips above relate to boosting one critical aspect of brainstorms: participation. As you plan your next content or campaign brainstorm, ask yourself how you can make the brainstorm engaging for everyone. By making it easier for your team to engage with others, give their thoughts, or suggest ideas in a brainstorm, you'll get more participation and -- ultimately -- more winning ideas from teammates that might not offer them otherwise. To learn about more brainstorming tactics, read this blog post. If you're interested in how you can encourage psychological safety in other areas of your business, check out these expert tips. [Read More ...] from https://blog.hubspot.com/marketing/virtual-brainstorm-tips By 2022, the number of email users around the world is expected to hit 4.3 billion. Among all of those users are members of your target audience, a.k.a. quality leads and prospects you can work to reach and convert via email. To ensure your emails stand out and grab the attention of these audience members, your email design needs to be on point. In this guide, we'll talk about what email design is, cover 13 best practices, examples of successful email design, and offer some tools you may be interested in experimenting with. Let's get started. Email DesignEmail recipients often scan information and abandon emails that don't offer them value or simply appear to be too dense. That’s why having great email design is so important — it'll help you capture the attention of, and engage, your email recipients. Your email design should be attention-grabbing, aesthetically-pleasing, and on-brand, among other things — let's dive into those things next with these 13 best practices for email deign. 1. Craft a strong subject line.Your email subject line is the first thing anyone sees when you send them an email. It’s the brief statement that’s supposed to pique the interest of your recipients. It should capture their attention so they want to open your email and continue reading. Here’s what a subject line looks like in your email inbox:
Here’s what a subject line looks like in your mobile device’s email inbox:
A great subject line will have these characteristics:
2. Write an attention-grabbing pre-header.Your email pre-header is a preview of what the email is about, similar to the meta description of a web page. It’s the second thing recipients see. Rather than rewriting the first sentence of your email, you can customize the pre-header to provide an inside look into what your recipients are about to read in your message. Here’s what a pre-header looks like in your email inbox:
Here’s what a pre-header looks like in your mobile device’s email inbox:
3. Be concise.How many times throughout the day do you find yourself opening an email thinking, I can’t wait to sit down and take the next 5-10 minutes to really dive into this email from Business X! If you're anything like me, your answer is likely rarely or never. Give email recipients the information they want and need from you without getting into the weeds. This will show them you value their time which has the potential to help you improve email subscriber retainment. 4. Keep your email on-brand.When your email recipients open your message, they should know the email was sent from your company. Meaning your email should be branded. To keep your email on-brand, consider using the following tactics:
5. Use the layout to enhance your email’s user experience.Nobody wants to read a cluttered and unorganized email — this makes recipients feel overwhelmed and can lead to increased abandonment. Instead, organize your layout with user experience (UX) in mind — meaning, leave empty/ white space and strategically place your written and visual content so it’s organized and easy to consume and navigate. 6. Personalize every email.When you customize an email and tailor it to your recipient, it'll feel more thoughtful, professional, and personal. Email personalization also helps you humanize your brand. This touch helps you foster a relationship between your business and email recipients and boost retention rates. 7. Incorporate unique visual content.If recipients open an email and only see paragraphs of information, it’s likely going to be difficult to hold their attention and keep them interested in your message. Rather, incorporate on-brand and engaging images, videos, GIFs, animations, etc. to break up the written content and create a memorable experience. And speaking of incorporating creative and unique visual content in your emails, let’s talk emojis. 8. Don’t be afraid to use emojis. ?At first, emojis may seem like an unnecessary or unprofessional addition to an email. While this may be a fair assumption, it’s actually untrue in a number of scenarios. In fact, when you add emojis to your email subject line and/ or email copy, you can increase your open and click-through rates. But remember: When using emojis for marketing purposes, make sure you know the meaning and connotation of the specific one(s) you incorporate. ? 9. Use a responsive design.A responsive design means your email changes format to fit the screen it’s being viewed on, whether it's on a desktop, laptop, or mobile device. Recipients will be able to read your emails with ease no matter where or how they’re viewing them. By incorporating a responsive design, you'll be able to enhance UX and improve email retention across all devices. 10. Optimize your email with CTAs.Calls-to-action (CTAs) are used to convert your email recipients. For instance, you can use a CTA to get recipients to follow you on social media, visit your website, chat with a sales rep, or become paying customers. CTAs should be visible, enticing, and clearly show why they’re valuable to click. Additionally, you might choose to personalize your CTAs to tailor them towards specific recipients — this tactic has been proven to increase conversions. 11. Add an "unsubscribe" button.Email marketing is highly effective as long as you’re providing relevant content to your recipients. The unfortunate but true reality of email marketing is that your recipients and customers change over time — especially as your business grows and evolves. Therefore, your content may not always be relevant to certain audience members. For this reason, allow your recipients to leave (or unsubscribe from your emails) on a good note so they can remember your business in a positive light — who knows, they may need your email content, products, or services again in the future. To do this, simplify their lives with an easy-to-use and visible "unsubscribe” button. In addition to offering a better experience for users, you're actually required by law to add that unsubscribe button. According to the Federal Trade Commission and CAN-SPAM Act, you’re legally required to include a “clear and conspicuous explanation of how the recipient can opt-out of getting emails from you in the future”. Meaning, that unsubscribe button isn’t an option. (If you need some inspiration, check out these effective unsubscribe pages.) 12. A/B test your design.Similar to most marketing efforts, email design is an iterative process. You might determine you need to make changes and updates to get the most out of your email design. Whether it’s modifying your CTA, colors, images, layout, or tone, don’t be afraid to A/B test designs to determine which one works best in terms of ability to reach, resonate with, and convert the greatest number of recipients. 13. Design an email signature.Great email signature design is another way you can establish a professional and personal feel over email. Email signatures shouldn't just include your name — they should contain other defining and memorable characteristics about you, your role, contact information, and company. Here are some specifics you can include in your email signature:
A great way to streamline the process of working on and incorporate all 13 of the above best practices is to use email design tools and software. In fact, many of the best practices we reviewed will come up naturally while you’re designing, writing, and planning your messages with email design software. Email Design ToolsThere are a number of email design tools with a wide range of capabilities (some completely unrelated to email design!) — here are some popular examples. 1. HubSpotHubSpot’s Email Marketing software allows you to create, design, personalize, and optimize all of your emails. You don’t need any IT or coding knowledge, and you can easily customize mobile-friendly emails. The software allows you to A/B test emails to determine which designs work best. 2. BEEProAs a BEEPro user, you can design responsive emails in just minutes. Smart design tools provide you with a quick way to format your emails and ensure your layout complements your content. You can also customize and save various email design templates so your messaging and branding is consistent. 3. MailChimpWith over 100 templates offered, MailChimp allows you to customize your email design for your target audience. If you’re someone who does have coding experience, and you want to take your design a step further, MailChimp offers you the ability to code your template as well. 4. StripoStripo requires no HTML knowledge to create and design professional email templates. All of their pre-made templates are responsive so readers can easily view them via any device. You can also sync your current email service provider (ESP) with the software to access all of your email and contact information from a central location. 5. ChamaileonAs a collaborative email builder, Chamaileon gives you the ability to invite members of your team to collaborate on your designs. The software ensures your emails will have a responsive design and automatically comes with over 100 pre-made templates to customize for specific recipients. Email Design ExamplesLet’s take a look at some successful email designs to inspire your work. HubSpot Marketing BlogHubSpot sends subscribers Marketing Blog emails every day. These include a few blog marketing-related articles to read and learn from. If recipients choose, they may also subscribe to HubSpot’s Sales Blog and Service Blog emails.
The emails are branded so readers immediately know who the email is from and what it will include. To make the daily emails engaging and unique, they include previews of the articles and an occasional quiz. Starbucks RewardsStarbucks customers and members may have seen this email, or something similar, in their inbox before:
The email complements Starbucks’ marketing and branding, and there’s plenty of white space separating the written information from the engaging imagery. And the CTA that recipients can click on to activate the offer is clearly placed. Vital Proteins Email DesignAlthough Vital Proteins' email design contains many images and a lot of information, it’s neatly organized so it doesn’t feel overwhelming to recipients. The email’s colors, font, and visuals are on-brand and feature the company’s products.
There's an obvious CTA that redirects recipients to their Instagram page — in turn, this type of CTA helps the company increase their follower count and brand awareness on the social platform. Grow Better With Really Good Email DesignWith great email design, you’ll reach and resonate with your audience members more effectively, allowing you to grow better. Eye-catching and impactful emails will help you build long-lasting relationships and convert more people into paying customers and brand advocates. So, begin designing your emails while keeping the best practices and examples we reviewed in mind. Editor's note: This post was originally published in August, 2017 and has been updated for comprehensiveness. [Read More ...] from https://blog.hubspot.com/marketing/email-design Instagram has become the favorite social network of many — and, as a result of its popularity, its become a major platform for marketing opportunities. For instance, consider the fact that 80% of Instagram users have made a purchase based on something they discovered on the platform. Additionally, folks don't just use Instagram casually, as 60% of the site's active users visit Instagram daily. But for those who have never used the platform before, or those who just want to take their usage to the next level, Instagram has some lesser-known tricks, settings, hacks, search options, and comment features you should know about. That's why we set out to find them and list them all in one place. Whether you're a recruiter looking to showcase your company's culture, a marketer in the ecommerce industry, or an individual who's just looking to use Instagram in the best ways possible, there are tips and features here for you. And for a quick overview of these hacks, check out this rundown from HubSpot Content Marketing Strategist Megan Conley. Note: Before getting started, make sure you're operating on the latest version of Instagram. At the time of publishing this guide, the latest version is 158.1 on iOS and on Android. Please also note that although this article might demonstrate each tip below using an iPhone or Android device, all items on this list are available for both operating systems and can be enjoyed using the same step-by-step instructions. 31 Hidden Instagram Hacks, Tips, and Features1. Get notifications when your favorite people post.Never want to miss an Instagram post from your favorite influencers again? You can choose to get a notification every time a specific user posts a new photo. All you have to do is turn on notifications for each user individually. To turn on these notifications, visit a user's profile, click the three dots in the upper right-hand corner of the post, click "Notifications" from the menu, and finally toggle on notifications for either posts or stories from the menu that appears.
Want to turn post notifications off? Just follow the same steps. It's important to note that you must enable notifications from the Instagram app in your phone's settings — here's how.
2. Add special fonts to your bio.Here's an Instagram bio hack that can truly make your profile stand out. You can already add emojis to the bio beneath your profile photo, but your keyboard limits your creativity right there. Using a couple of basic third-party websites, you can copy over some more special fonts not often found in the Instagram community. Here's how. To Add a Special Font to Your Bio via Mobile:Add a new font to your Instagram bio via your mobile device using a website like LingoJam. Open the site on your phone, type your desired bio text in the lefthand text box, and you'll see the same bio text in different typefaces appear on the right.
Carry your chosen font over to your Instagram bio by tapping it and selecting "Copy." Then, open your Instagram app, navigate to your profile, select "Edit Profile," tap the "Bio" section and paste your chosen font into the empty field. To Add a Special Font to Your Bio on Desktop:If you're editing your Instagram profile on your laptop or desktop, Font Space has a library of fonts you can download and copy into your bio in seconds. To do so, Find a font you like and select "Download" beneath the font's sample image, as shown below.
Downloading this font will open a folder on your desktop where you can pull a ".ttf" file that carries the various versions of this font. The file will look something like the screenshot below.
Once you have this font copied to your computer's clipboard, open your internet browser and log onto Instagram.com. Select "Edit Profile" and paste your downloaded font into your bio field. You can then edit the sample text that came with your font to write your new bio as you see fit. 3. Add special characters to your bio.Not only can you customize your bio with a special font, but you can also add atypical characters that distinguish you or your brand — but that you wouldn't find on your smartphone's normal keyboard. These include §, †, or even ™ if your Instagram name features a trademarked product name. To Add Special Characters From MobileUsing your mobile device, install a free mobile app like Character Pad, which catalogs nearly every character and symbol you might need but won't find in the 26-letter English alphabet. Open the app and find the character you want to add to your Instagram bio. In Character Pad, you'll simply double-tap the picture of your chosen symbol to paste it into a text box, as shown below. Then, copy this character to your phone's clipboard. (For our purposes, I double-tapped the half moon icon.)
Once you have your symbol copied to your clipboard, open Instagram, navigate to your bio, and tap "Edit Profile."
Hold down your finger on the field of your bio you want to insert your special character until "Paste" appears as an option, as shown below. Tap "Paste" and then "Done" you'll be all set.
To Add Special Characters From a PCYou can also insert special characters and symbols through Instagram's web client on a desktop or laptop computer. The easiest way is to use Microsoft Word's "Symbol" insertion icon, as shown below.
Select your desired symbol or character and copy it to your computer's clipboard. Then, navigate to Instagram.com and follow the steps above to paste your character into a particular part of your bio. You might be tempted to simply Google search the special character you want, and at times it might work just as well as the steps above. But keep in mind not all special characters you copy from the internet are "clean" when you paste them into Instagram — some of them might become corrupted or not show up correctly. 4. Search Instagram users without an account.As much as Instagram would like to see you ultimately create an account for yourself or your business, you can peruse the beautiful brands, people, and dogs that are waiting for you without an account to see if it's worth signing up. There are two ways to search for people on Instagram without logging in: Entering a Username at the End of the Instagram URLThe first way to search users without an account is by using an Instagram username you already know, and adding it to the end of "www.instagram.com/." For example, if you were to start with our Instagram username — which is simply "HubSpot" — you can enter the following into your browser's address bar: www.instagram.com/hubspot. This will bring you to our Instagram profile as well as the elusive search bar at the top of the page:
Once you've reached this page, you can use the search bar to the left of the "Sign Up" button to browse users who are already active on the platform. Googling Them in an Instagram Site SearchA slightly "hackier" way of looking up users without an Instagram account of your own is to simply search their name in a Google site search. This means telling Google to only look up search terms on a website of your choice (in this case, Instagram). To site search a user, open a Google search and type the following: "site:instagram.com [name of user]." By keeping all the text prior to the brackets in your search bar, you can shuffle through names of people and businesses and Google will produce results that live only on Instagram. Here's what a site search looks like for HubSpot, below. As you can see, Google produces our main profile, our culture-focused HubSpot Life profile, Instagram posts that include the #hubspot hashtag, and our HubSpot Academy Page.
5. See all the posts you've liked.Ever wanted to see the posts you've Liked, all in one place? All you have to do is go to your own profile and click the "Settings" button in the top right — a gear icon on iPhone/iPad, and three dots on Android — then, click "Account", and finally "Posts You've Liked."
To un-Like any of the posts you've Liked, simply go to the post and deselect the "heart" icon below it. Don't worry — the user won't be notified that you've un-Liked the post. 6. Add and manage multiple accounts from the same device.Have a separate account for your dog? Don't be embarrassed; stand by your puppy profile. In fact, whether it's a pet account or a business account, you can add and manage this one right alongside your personal account. Here's how:
To toggle between both profiles, hold down your profile picture in the navigation bar to view all connected accounts. You can also switch to a different account through the Settings page mentioned earlier. See what this screen looks like in the next Instagram feature, below. 7. Schedule posts in advance.Instagram being a mobile app, you're probably in a routine of taking photos and posting them to your Instagram Story on the fly. But, you can also pre-post them from your computer for a set day and time in the future. This feature is available with a social media scheduling tool, as well as HubSpot if you have an Instagram business account. If you have this business profile, switch to it via the Instagram mobile app and follow the prompts to connect it to Facebook.
Depending on the social scheduling tool you use, you might not include this step. Once you've toggled to the right account, however, you'll launch your scheduling tool, navigate to your current connected profiles, and see Instagram as an available integration. 8. Optimize your Instagram bio to appear in the Explore tab.Your friends, family, and coworkers might be your first group of Instagram followers, but growing your audience takes more than the people who already know you. One key way to do this is to get your profile to appear in Instagram's Explore page.
The Explore page, accessible using the magnifying glass icon shown above, is a browsing page that sorts the entire Instagram community by topic and keyword. These include "Fitness," "Style," "Science," and more. Hashtagging your posts with these words can expose your content to the people browsing these topics, but you can also use them in your Instagram name and bio to promote your profile. If Jane Doe is a marketing consultant, for example, she might want to make her Instagram name "Jane Doe Marketing," rather than simply "Jane Doe." Then, in her bio, she can include all of her specialties, such as "SEO," "blogging," "email marketing," etc. 9. Create a collection of saved posts.In addition to being able to view all of the posts you've liked, Instagram also has an option to save or bookmark certain posts in collections that you create. Start by going to your profile, and tapping the "Settings" icon at the top-right of your screen, and then select "Saved":
Next, press the "+" button and name your new Collection. Click "Next", and select images from your "Saved" section.
To save photos for future collections, tap the bookmark icon below the post you want to add, as shown below:
Then, go back to your saved photos by following the previous steps. You'll see the photos you've saved — to add them to your Collection, select the Collection you want to add to, and tap "Add to Collection." From there, you can add any of your saved photos.
10. Use 'Type Mode' to enhance your Instagram Stories.Instagram Stories is a feature of Instagram that allows you to post ephemeral photos that show up separately from your profile and only last 24 hours. It's a great function for helping like-minded users discover your profile on Instagram's homepage. But since its beginning, Stories have become quite creative, and it takes more than a pretty filter to stand out to your audience. Enter "Type Mode," an option similar to Snapchat that gives you the power to caption Stories that need extra context to resonate with someone. Here's how to use it: 1. Open Instagram Stories by swiping right from your Instagram feed. This will launch your smartphone camera. Then, take a photo or video and press the "Aa" icon to the top-right of your screen, as shown below: |

Joseph Ashley
Juice is a drink made from the extraction or pressing of the natural liquid contained in fruit and vegetables. It can also refer to liquids that are flavored with concentrate or other biological food sources, such as meat or seafood, such as clam juice. Archives
February 2021
Categories |
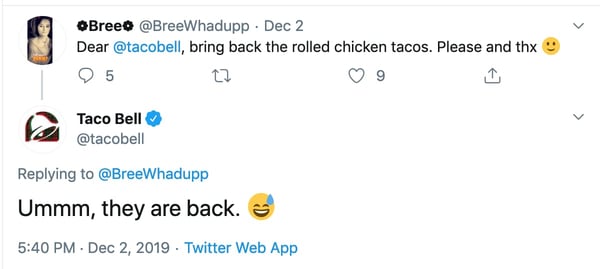
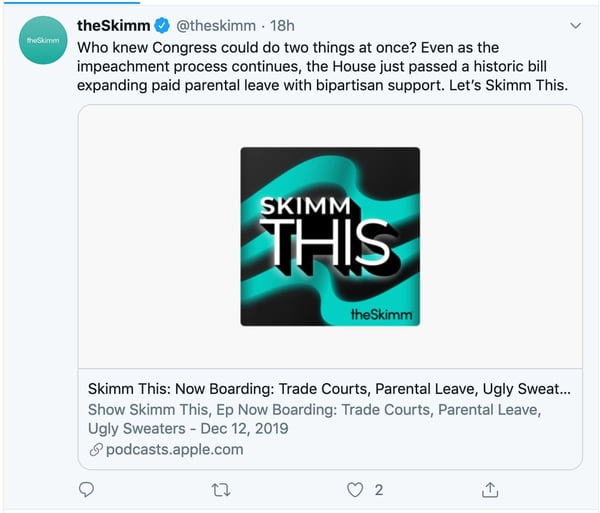

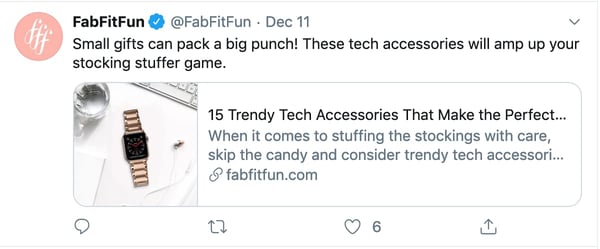

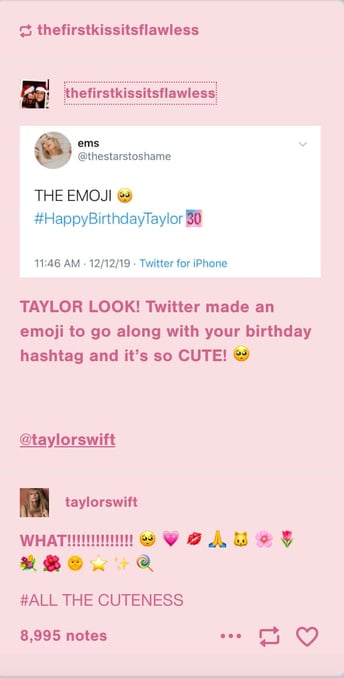

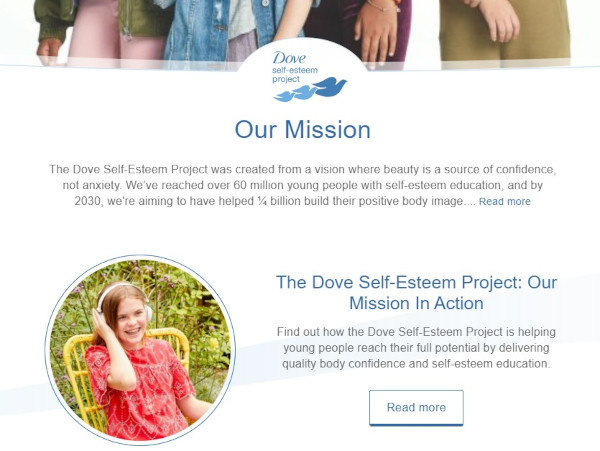
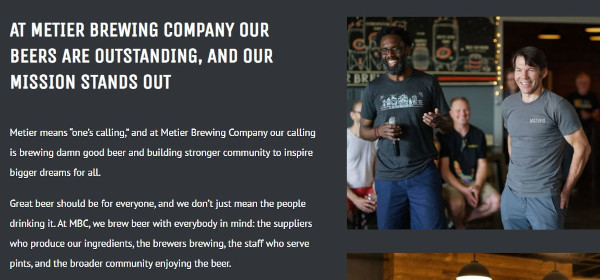


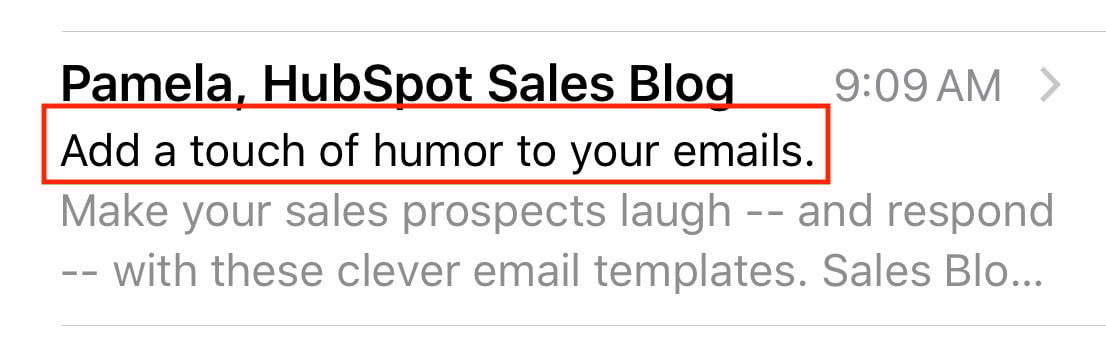

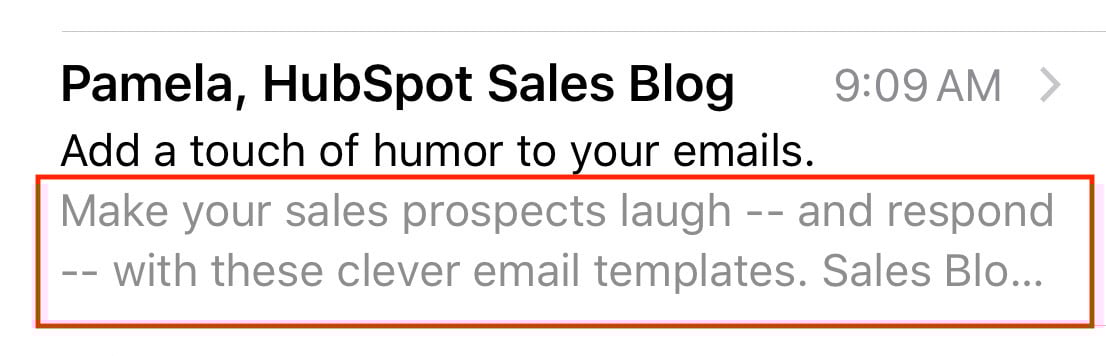
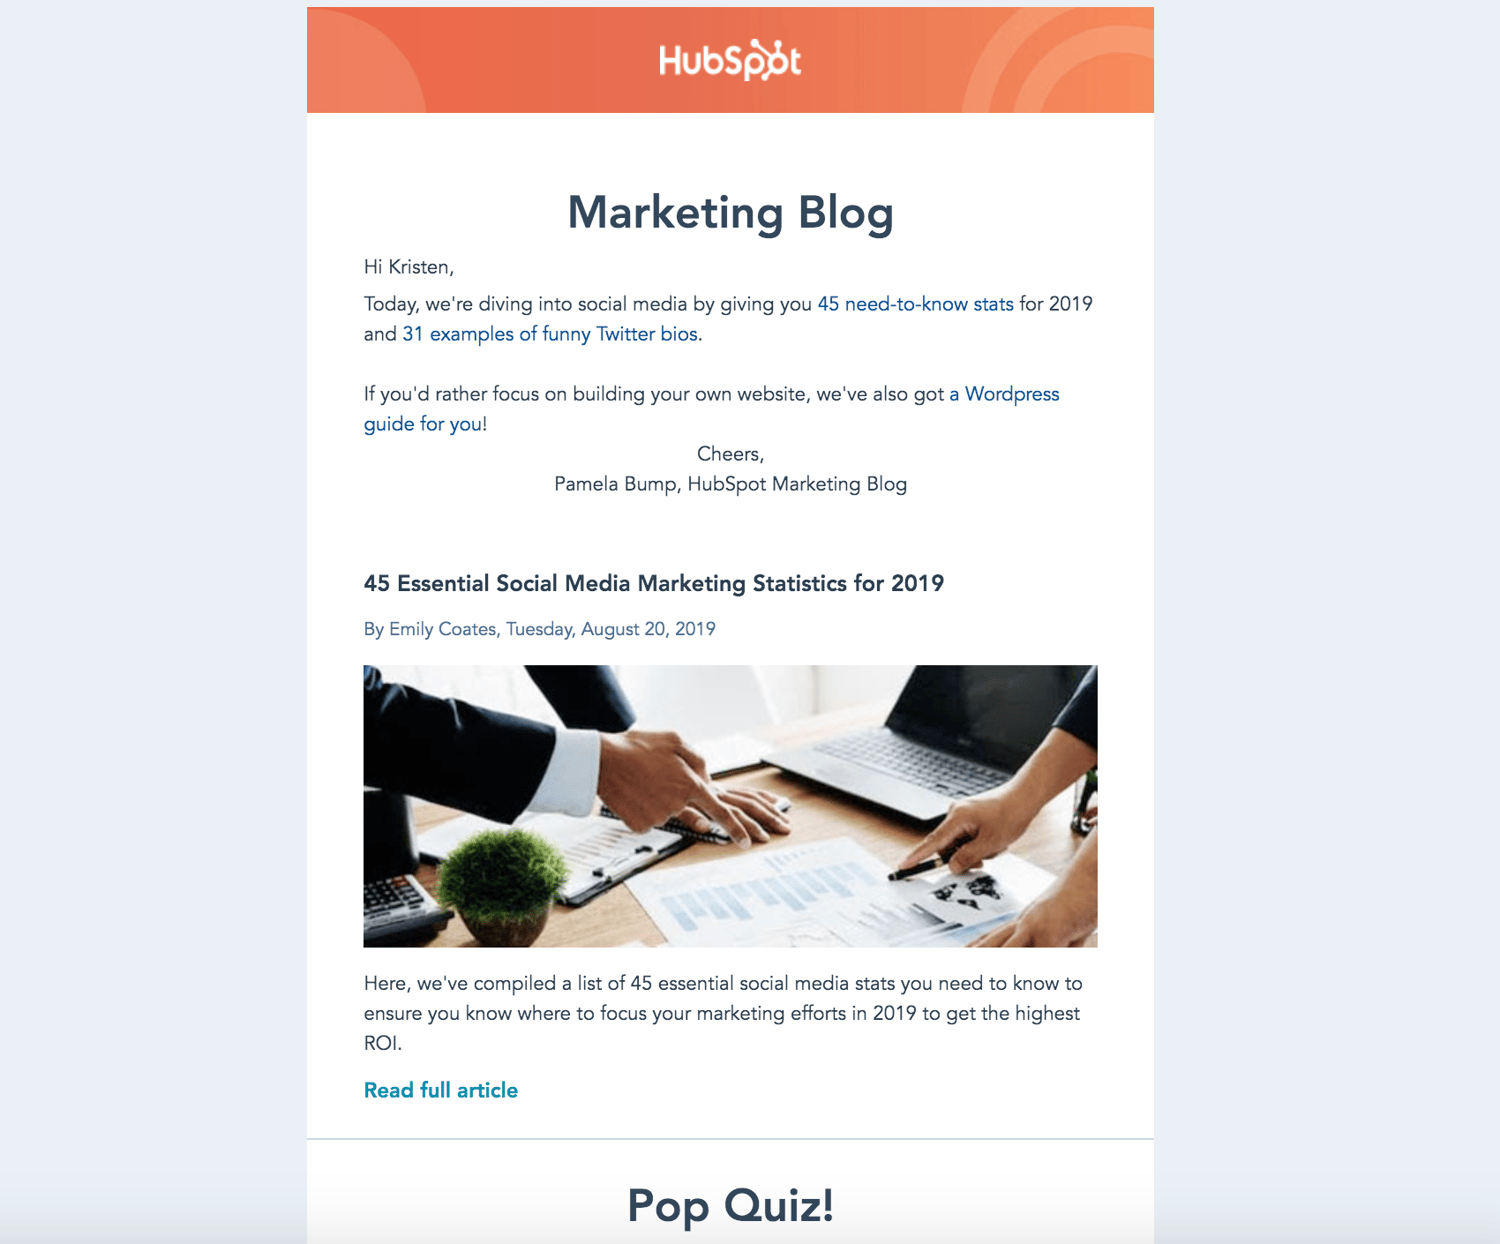
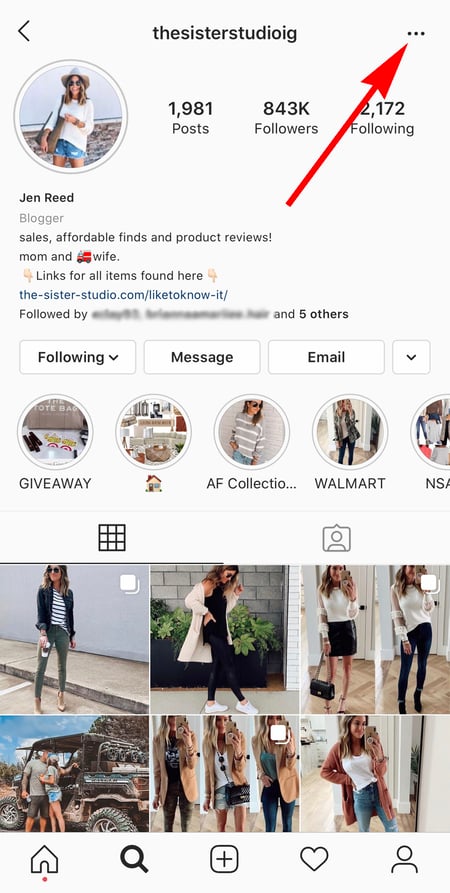
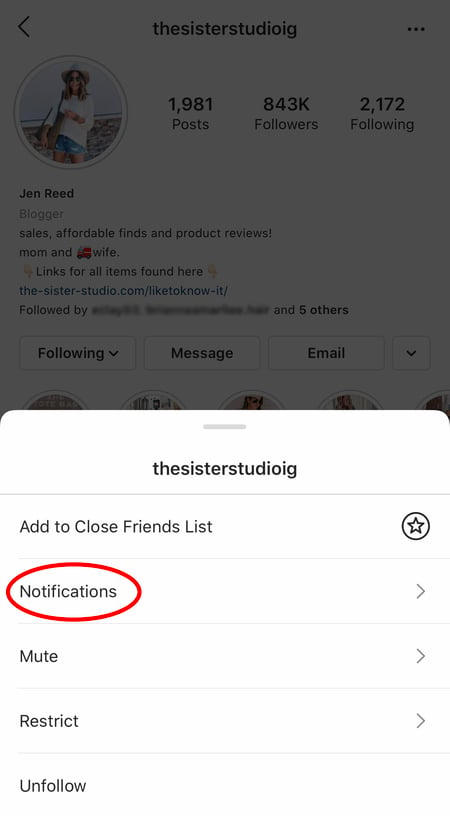

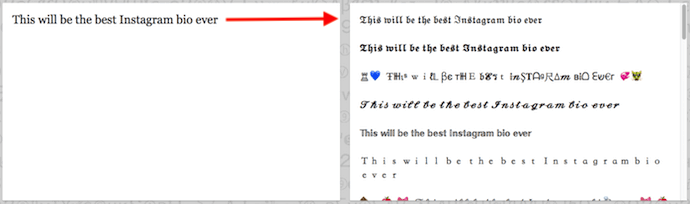
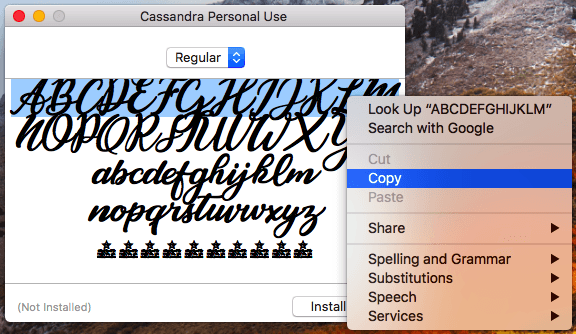
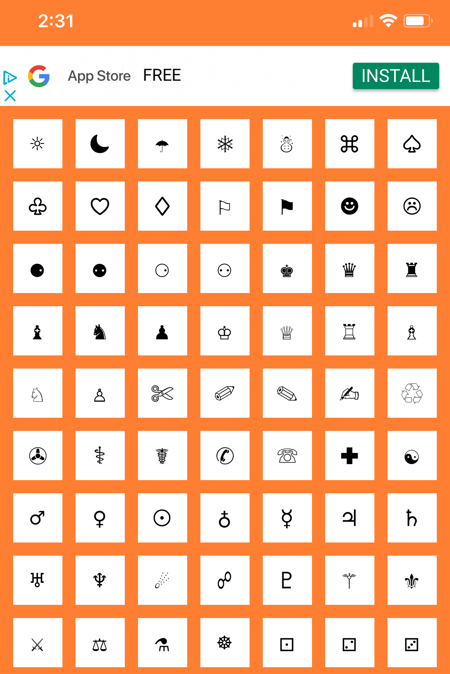
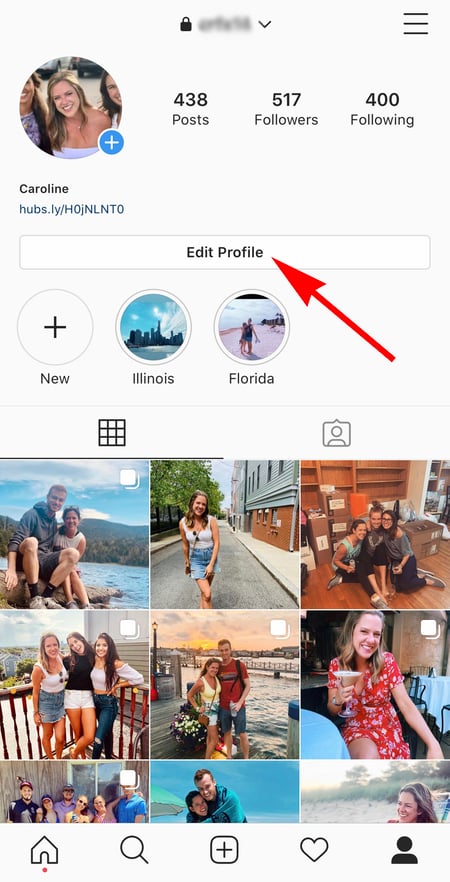
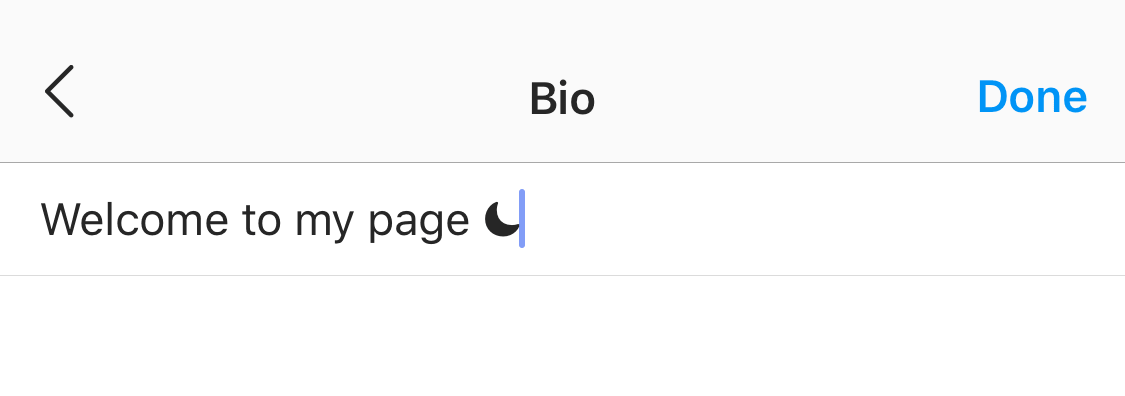

.png?width=2310&name=Screen%20Shot%202020-09-14%20at%2010.50.33%20AM-min%20(1).png)
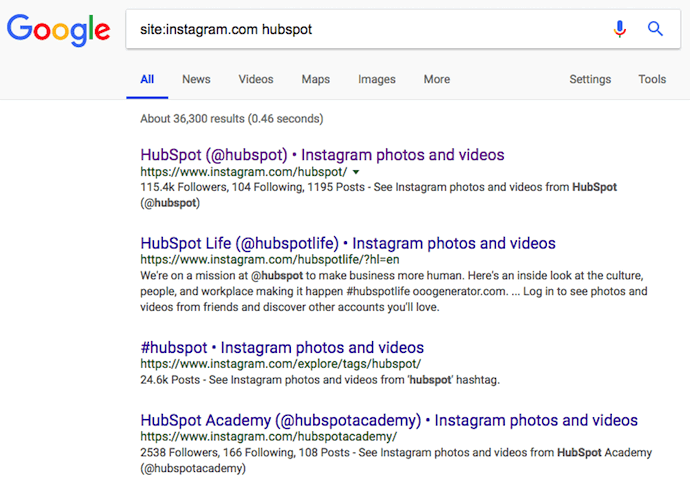
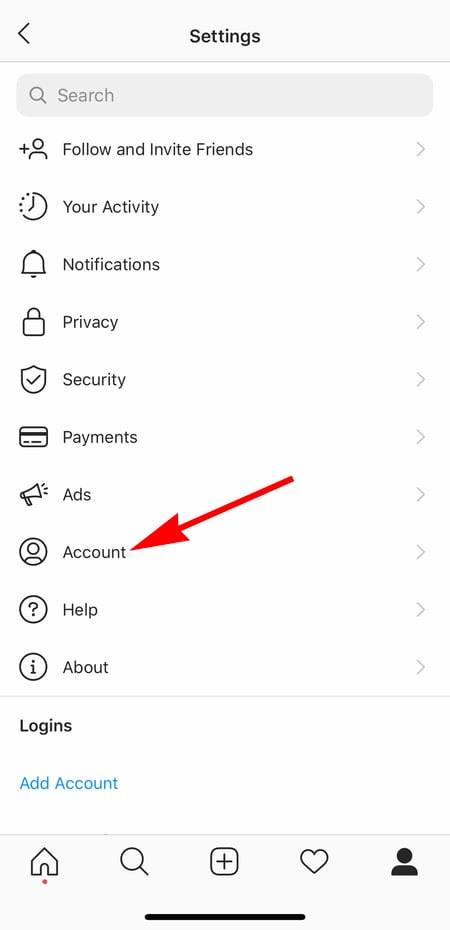
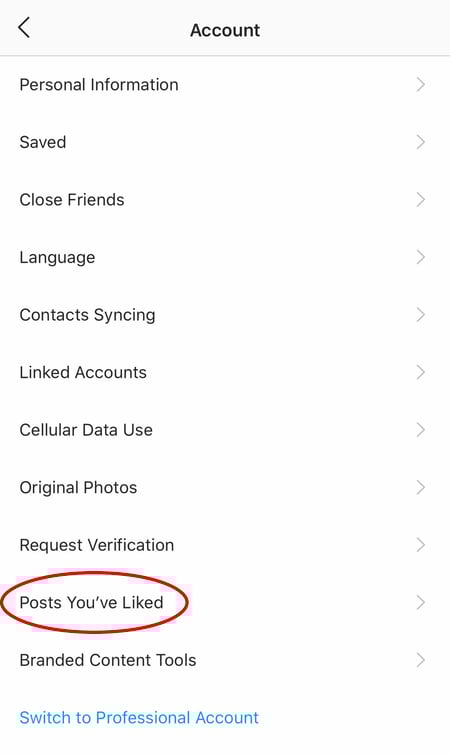

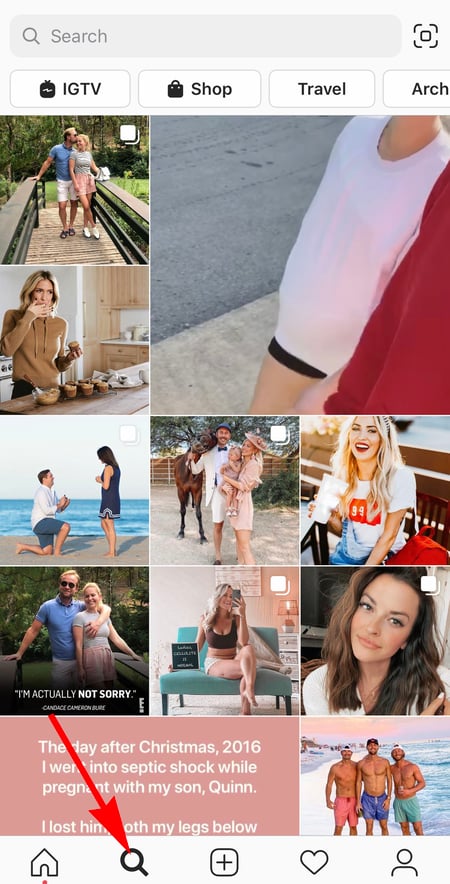
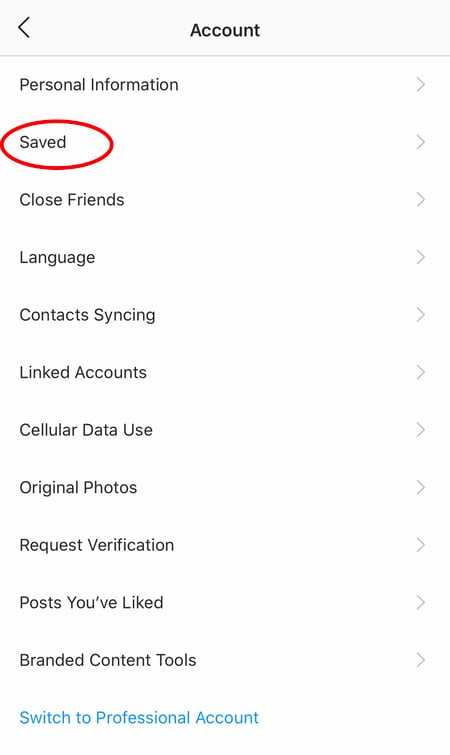
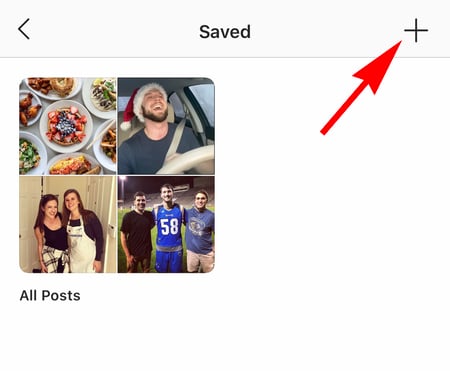
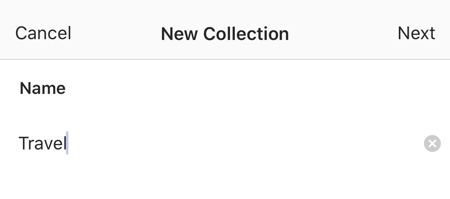
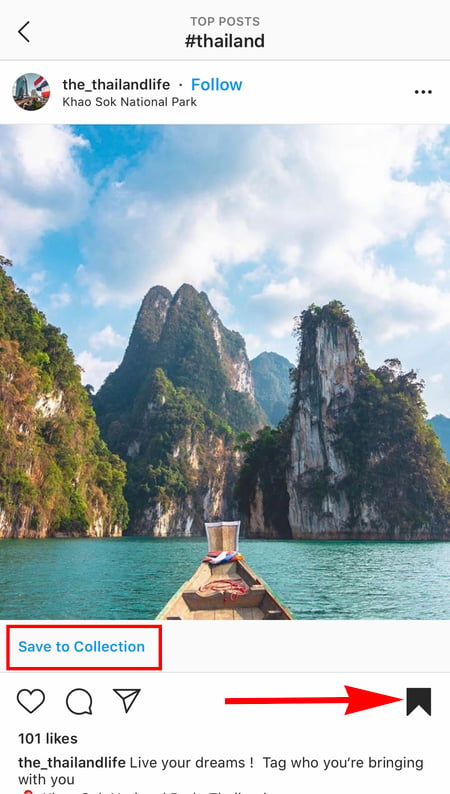
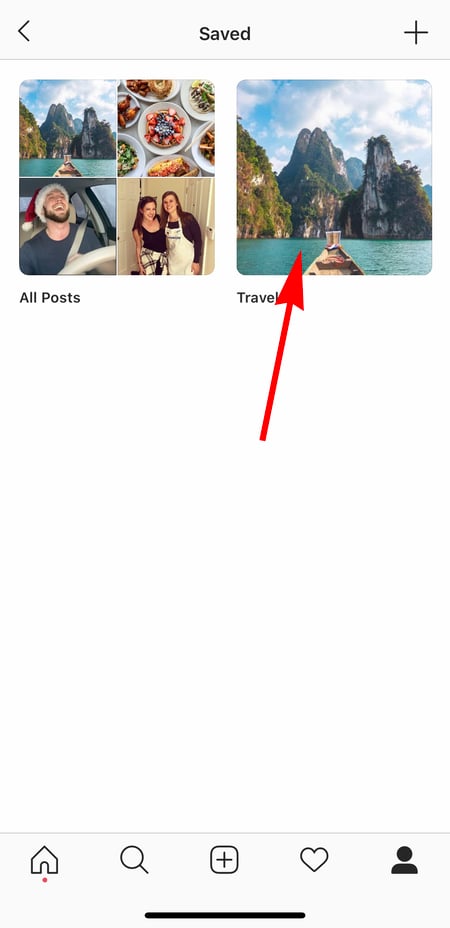

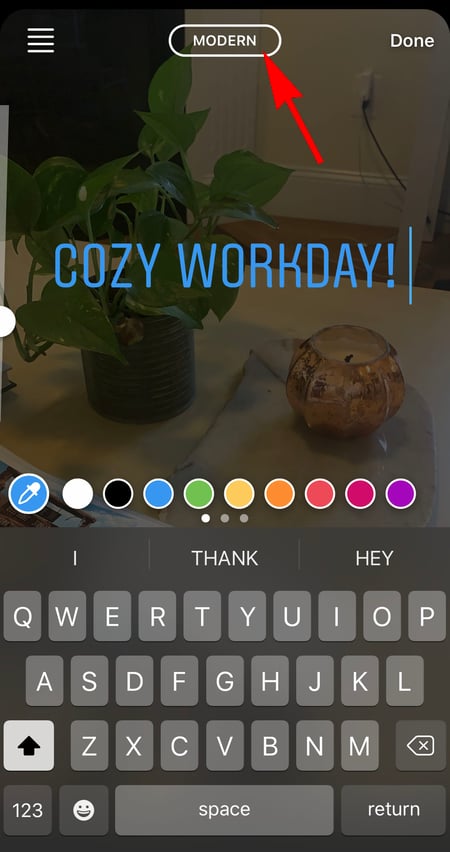

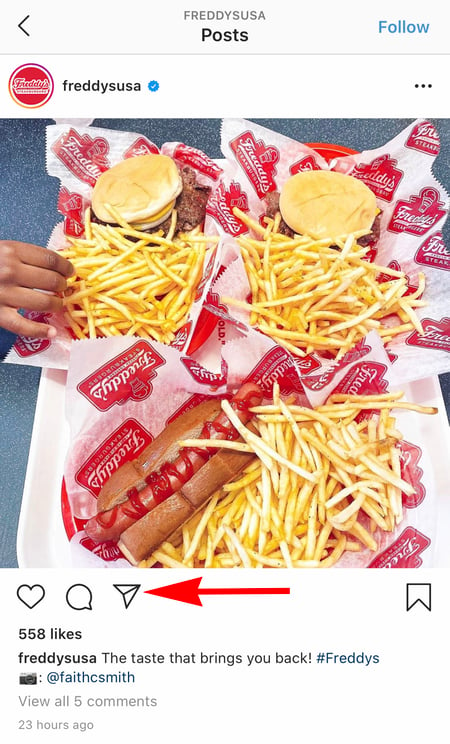
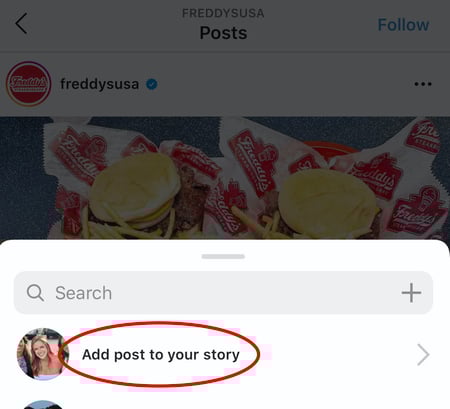
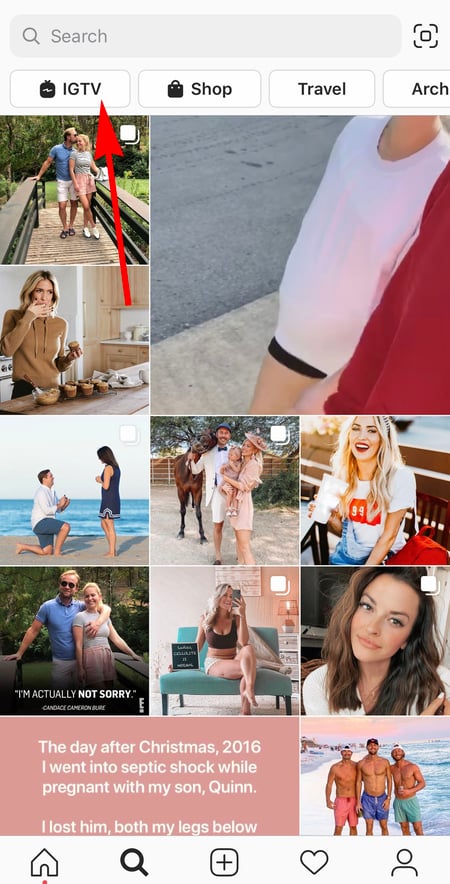
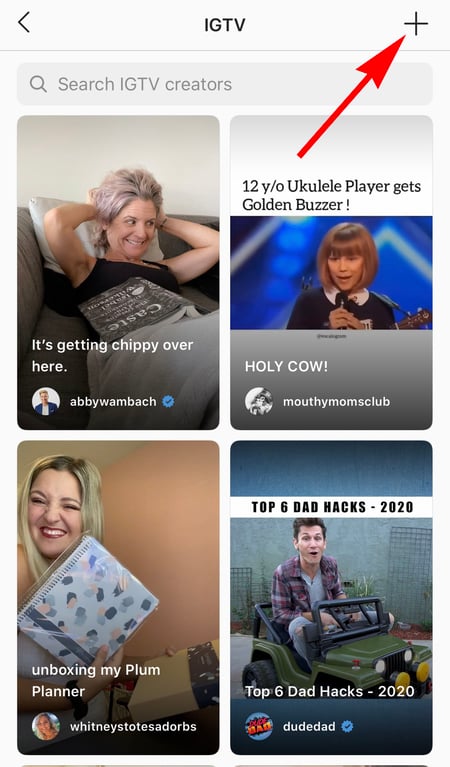

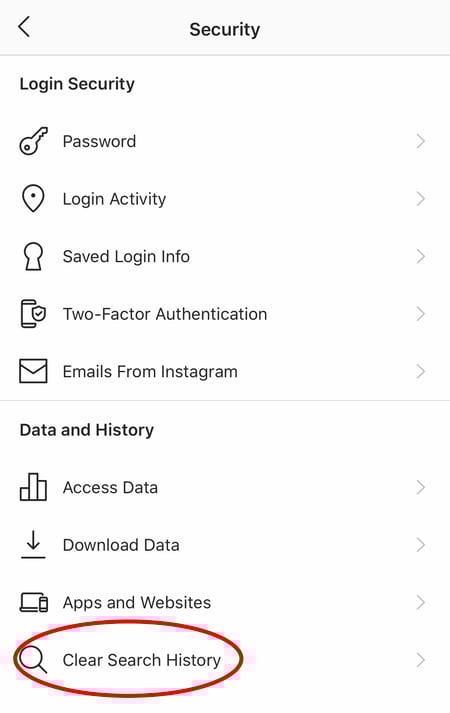
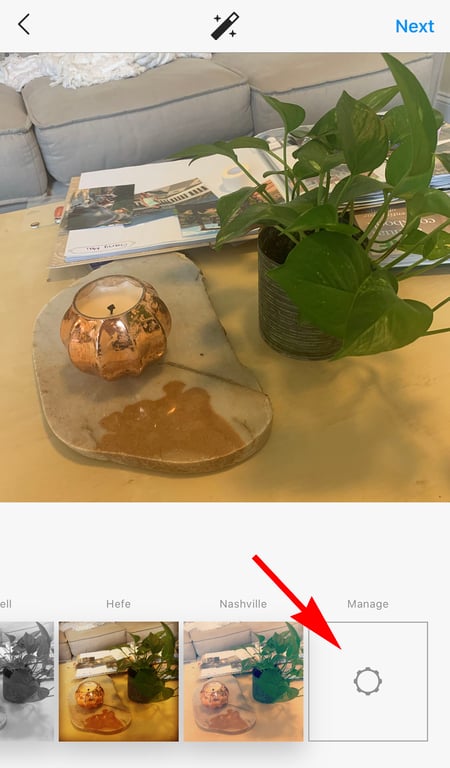

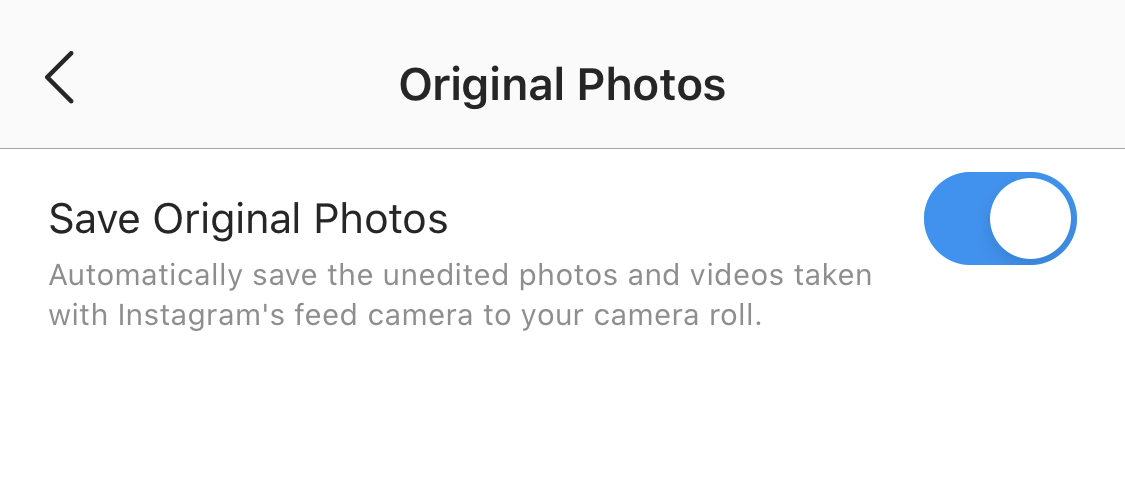
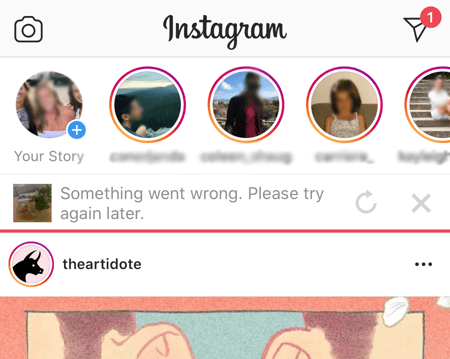


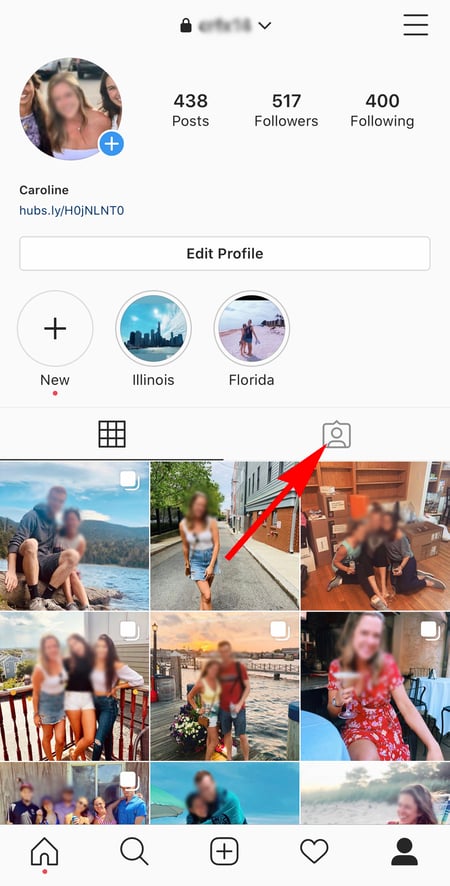
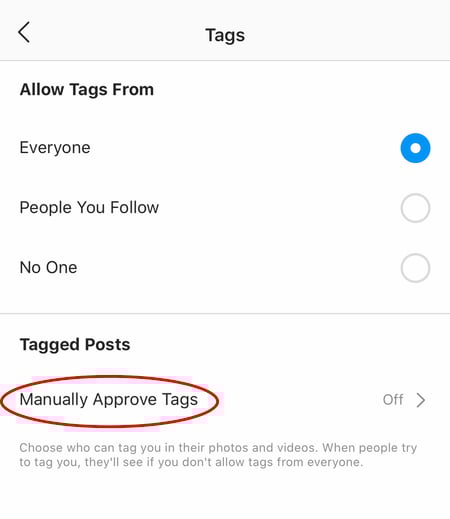
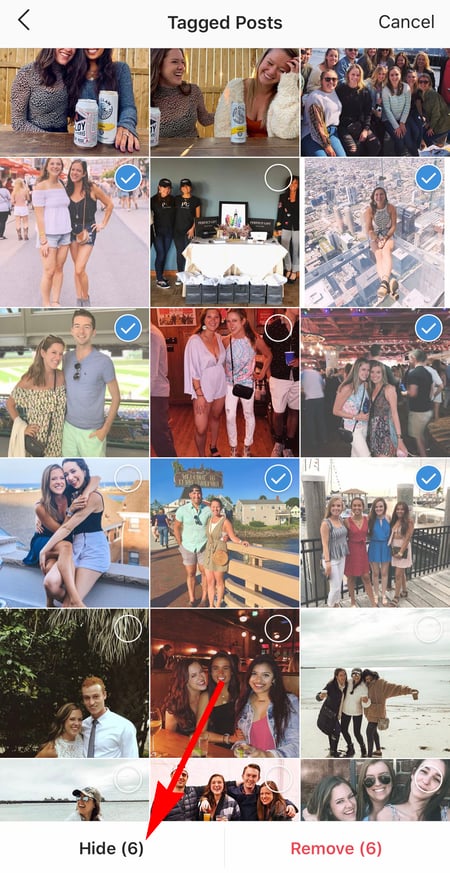
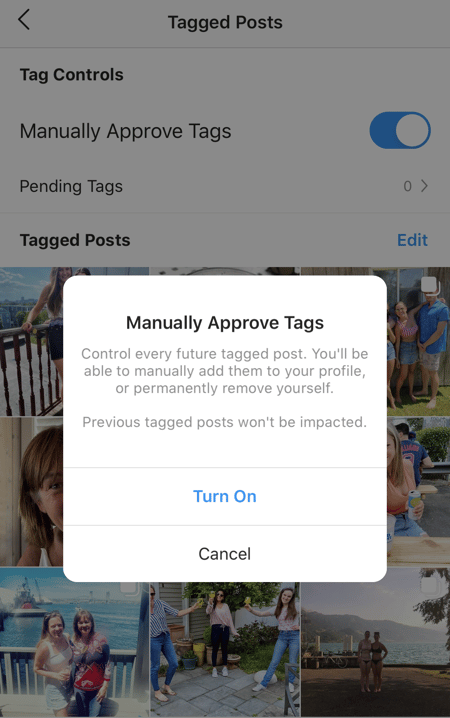
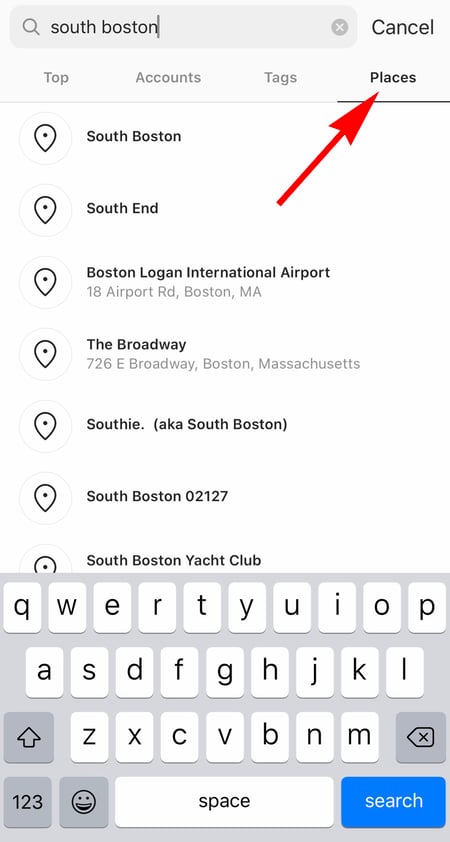
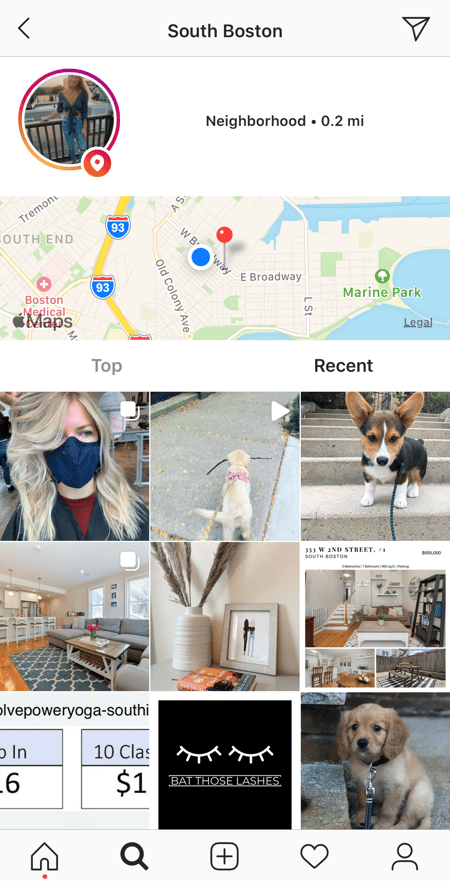
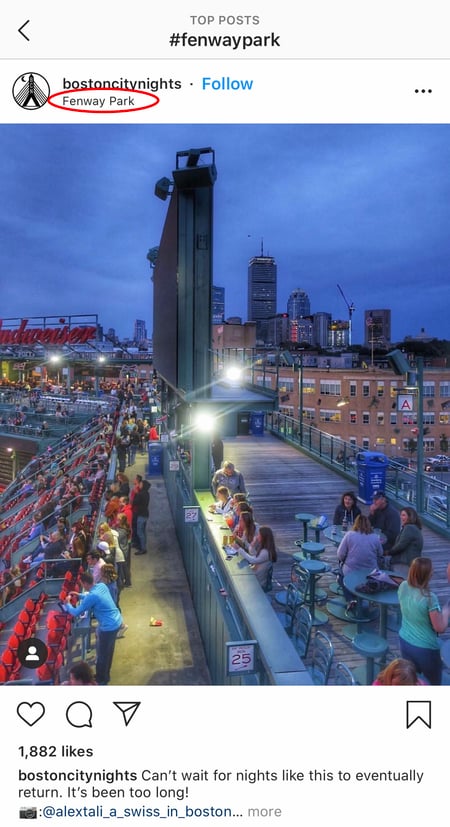
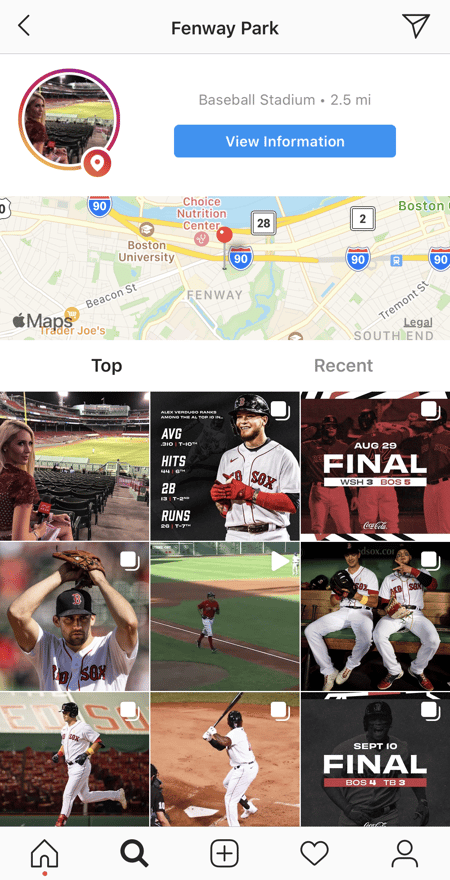
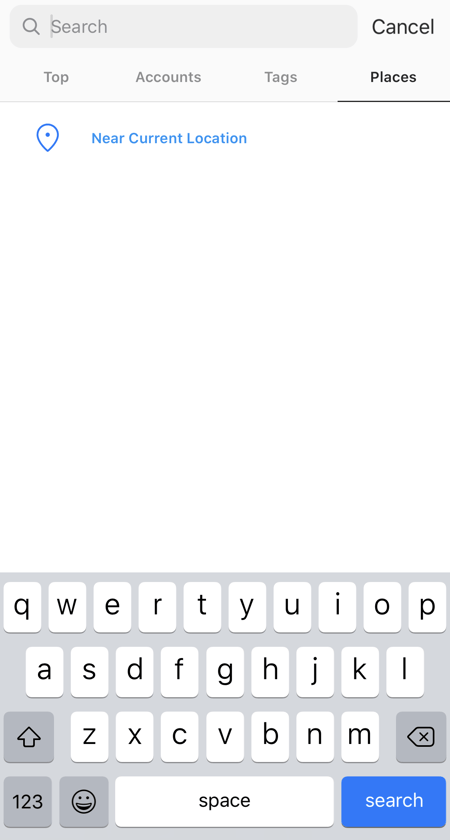
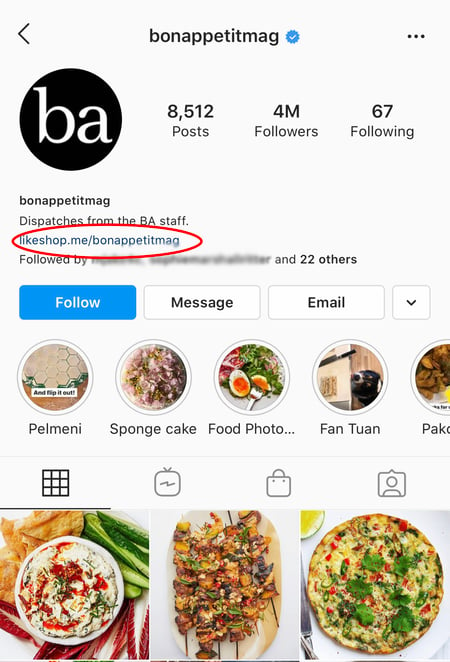
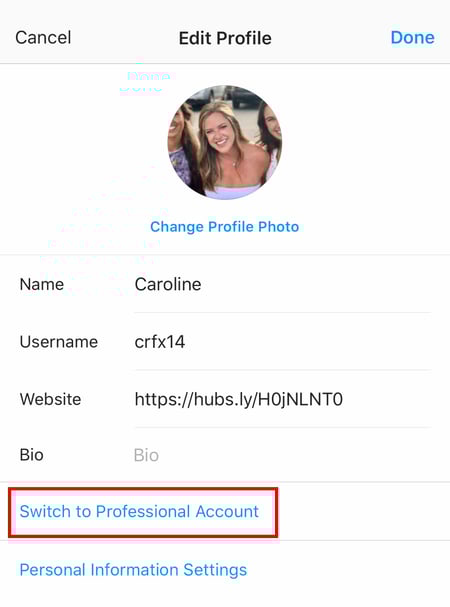

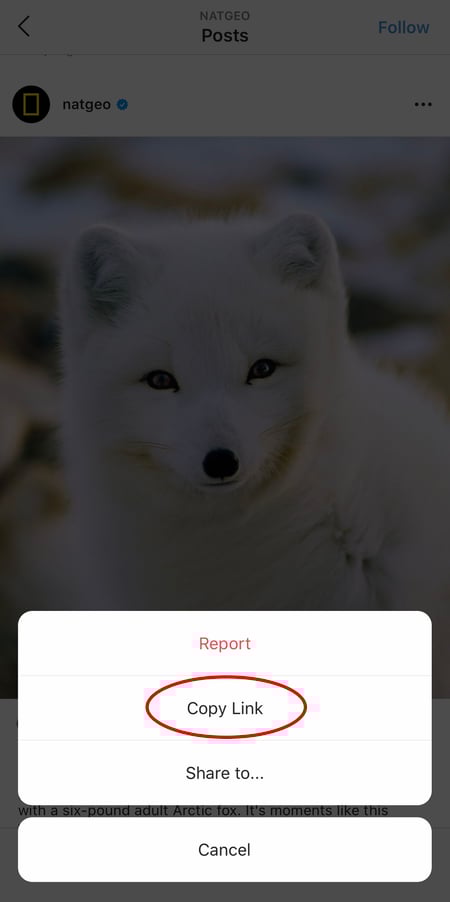
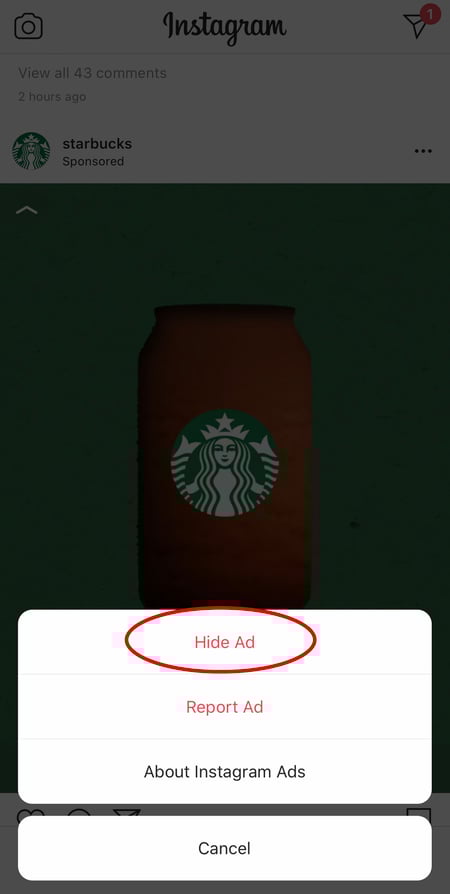
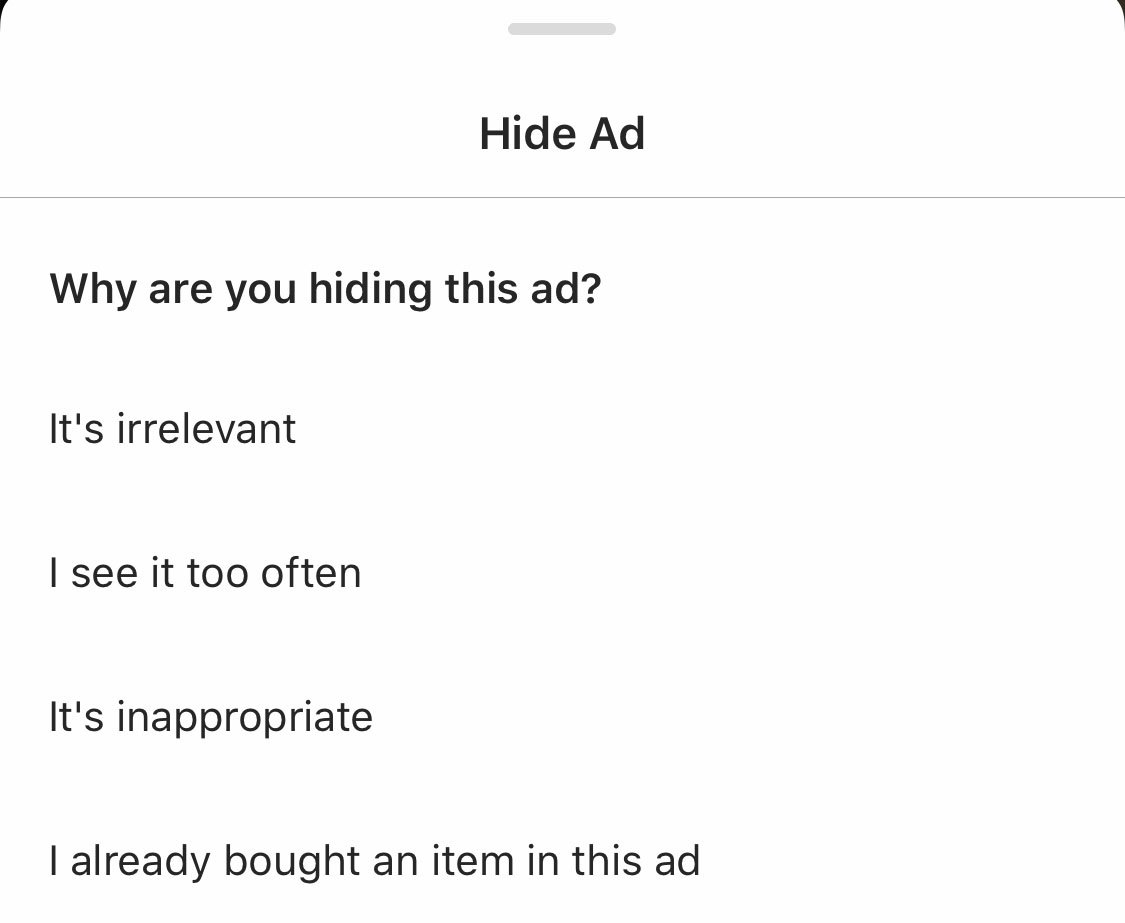
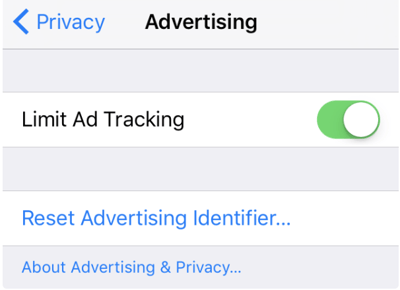

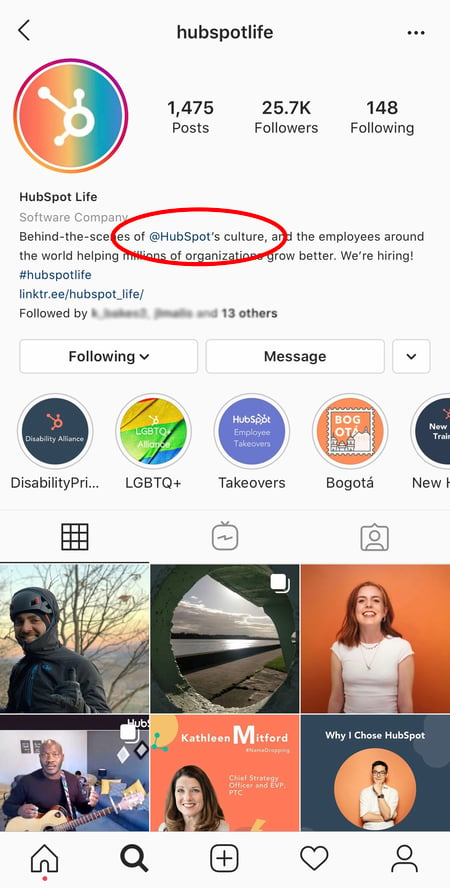
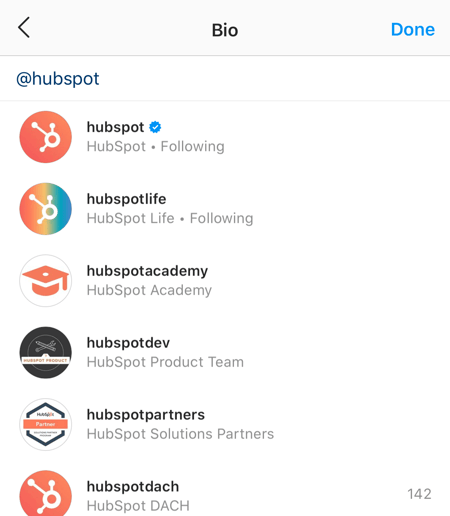
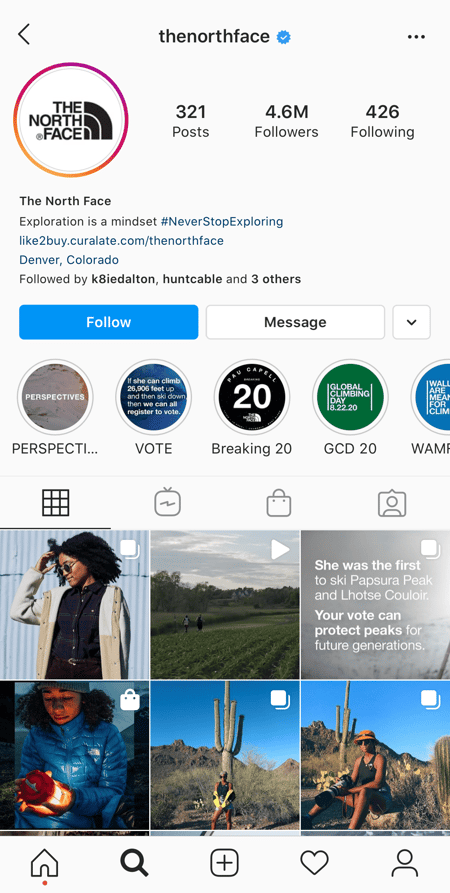

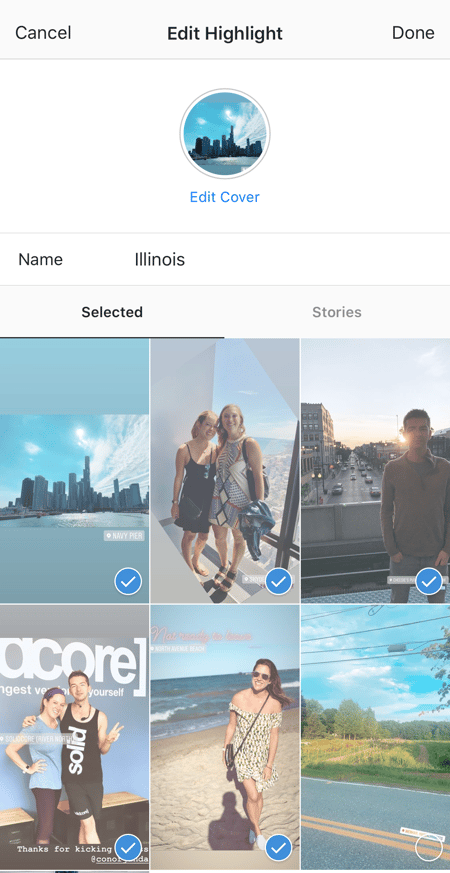
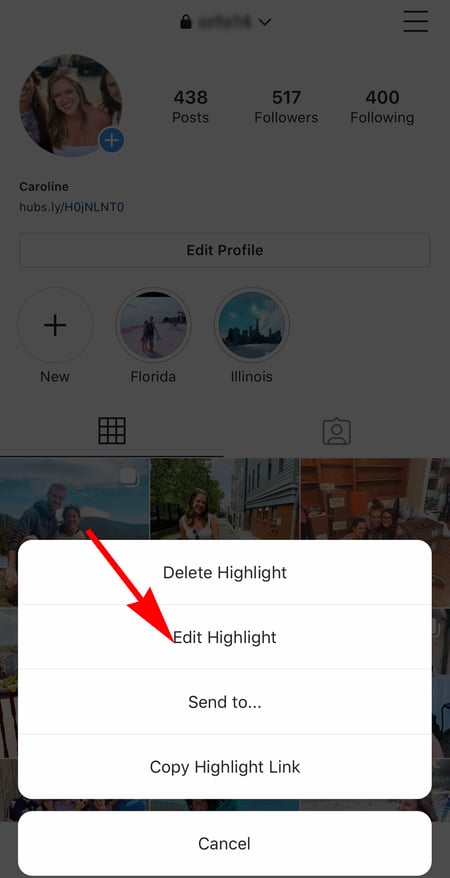 Next, click "Edit Cover". Scroll through your camera roll to find an image you like.
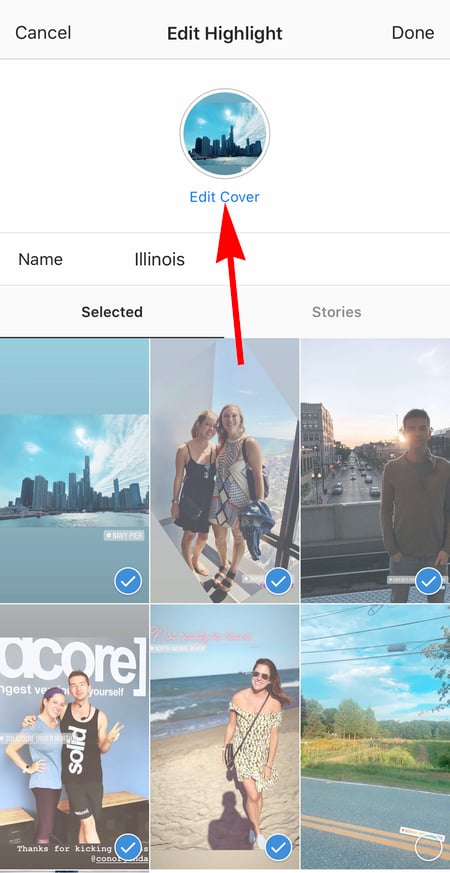
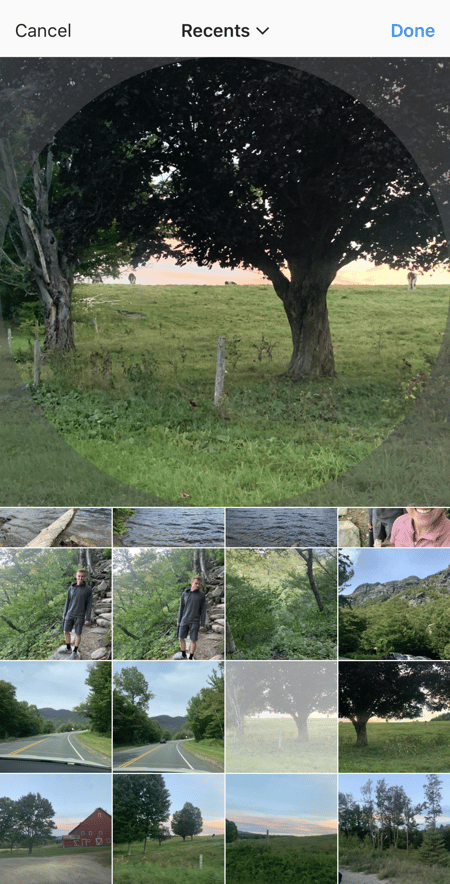 Once you choose an image from your camera roll, click "Done". Your Highlight cover image is now an image you've never posted on your Instagram account:

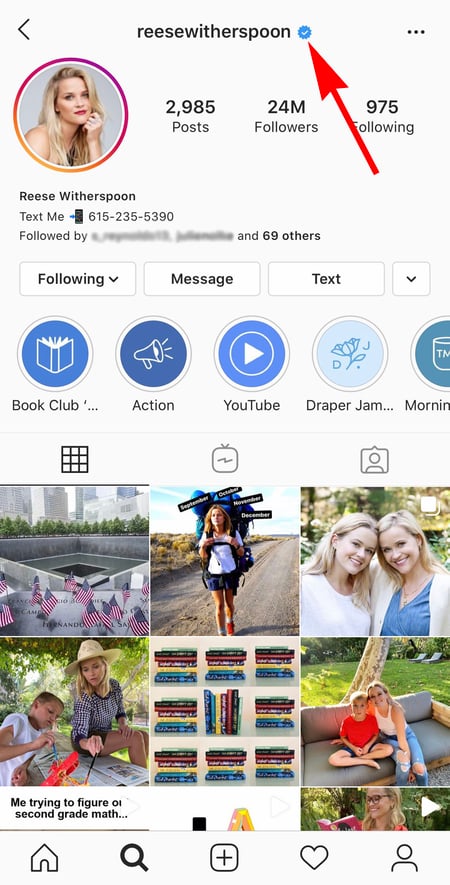
 RSS Feed
